# Sangoma
# FreePBX Debian Install
### VM Setup
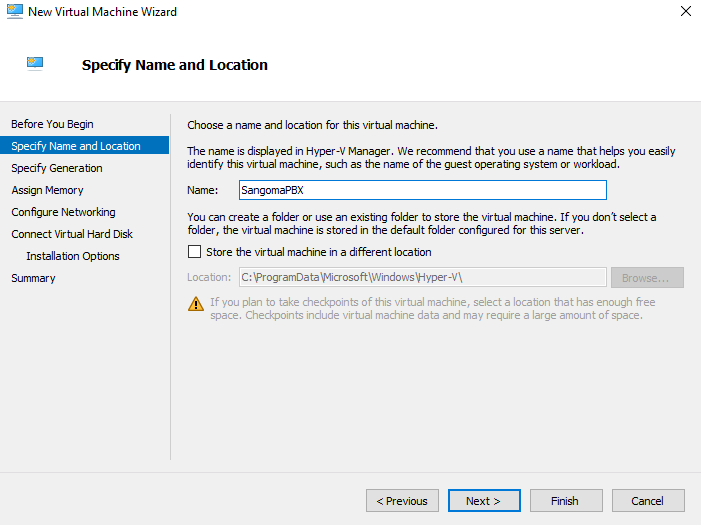
##### 1. Create a New VM and give it a name
[](https://bookstack.archfox.org/uploads/images/gallery/2025-02/clkbo8B2lC0foq7l-image.png)
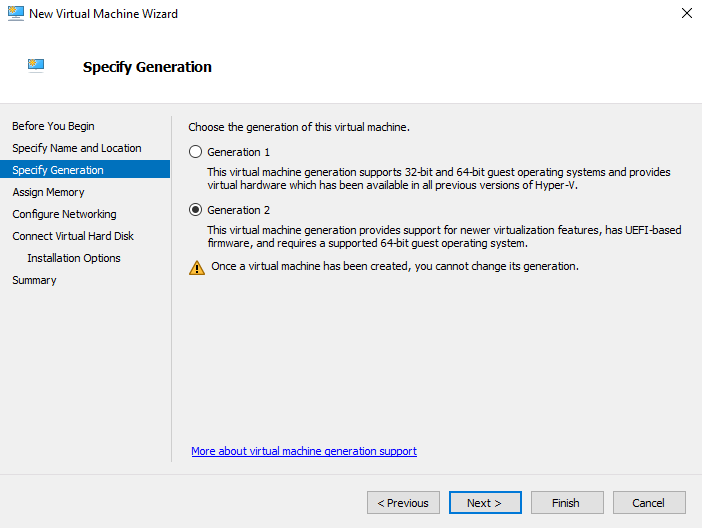
##### 2. Make sure it is Generation 2
[](https://bookstack.archfox.org/uploads/images/gallery/2025-02/TAcHvDCkNt4RiJ8w-image.png)
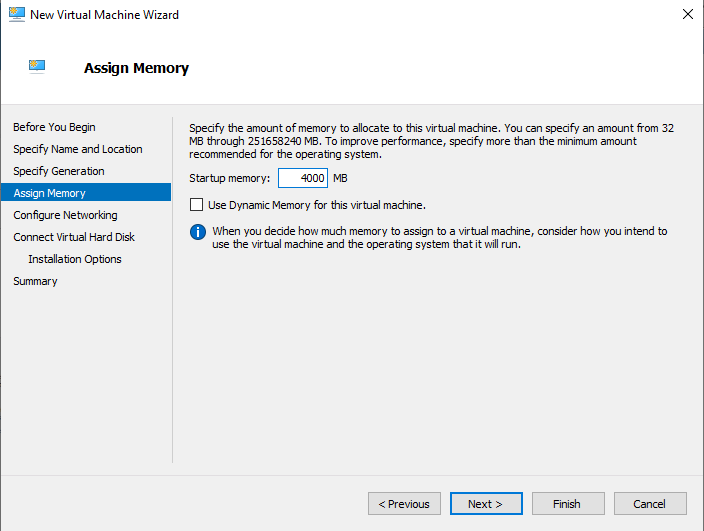
##### 3. Make sure it has at least 4000 MB of memory. This is enough but more can be allocated if available.
[](https://bookstack.archfox.org/uploads/images/gallery/2025-02/ILLW4GAQhUW9oeTs-image.png)
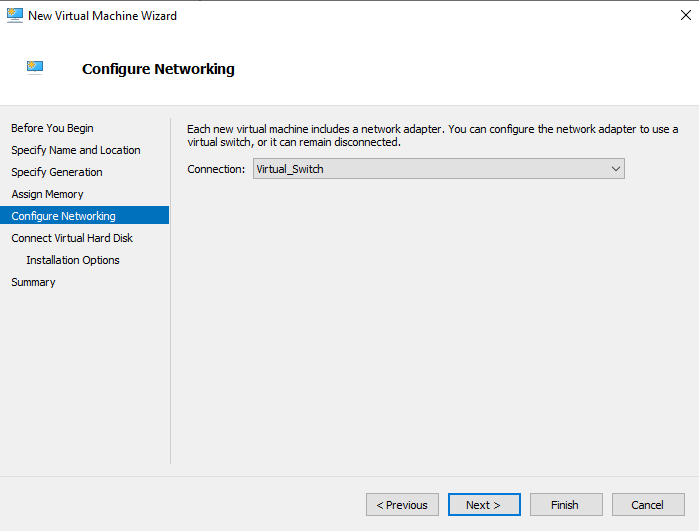
##### 4. It is important to make sure it has a working internet connection
[](https://bookstack.archfox.org/uploads/images/gallery/2025-02/Y5fvAqR5e2W2Ifhh-image.png)
##### 5. Create a virtual hard disk. Make sure it has at least 40 GB of Storage. This should be plenty but more can be used if available
[](https://bookstack.archfox.org/uploads/images/gallery/2025-02/7mJgY3G5iqwye2s2-image.png)
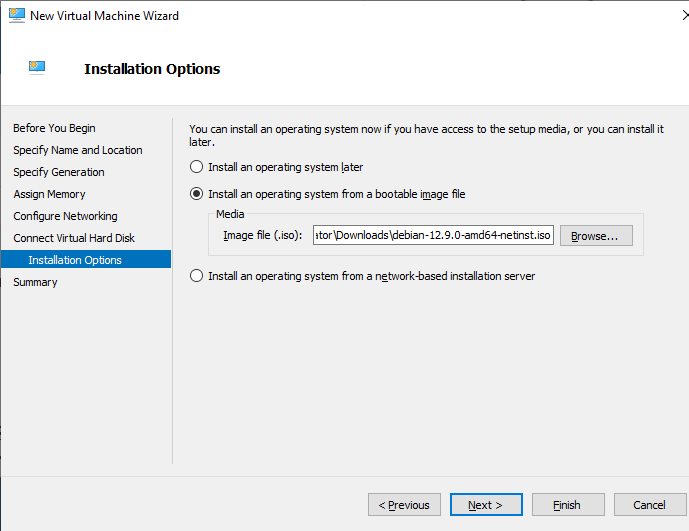
##### 6. Choose to install from a bootable image file and pick the Debian.iso which can be downloaded from [here.](https://www.debian.org/download "Debian Download")
[](https://bookstack.archfox.org/uploads/images/gallery/2025-02/22bMG7Gobr2V2Ikx-image.png)
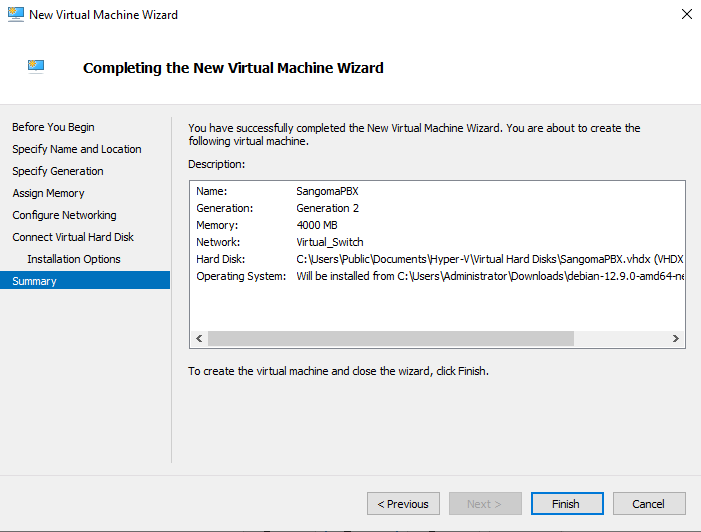
##### 7. Finish
[](https://bookstack.archfox.org/uploads/images/gallery/2025-02/p61WlcXrMHJ1s0WV-image.png)
### Debian Install
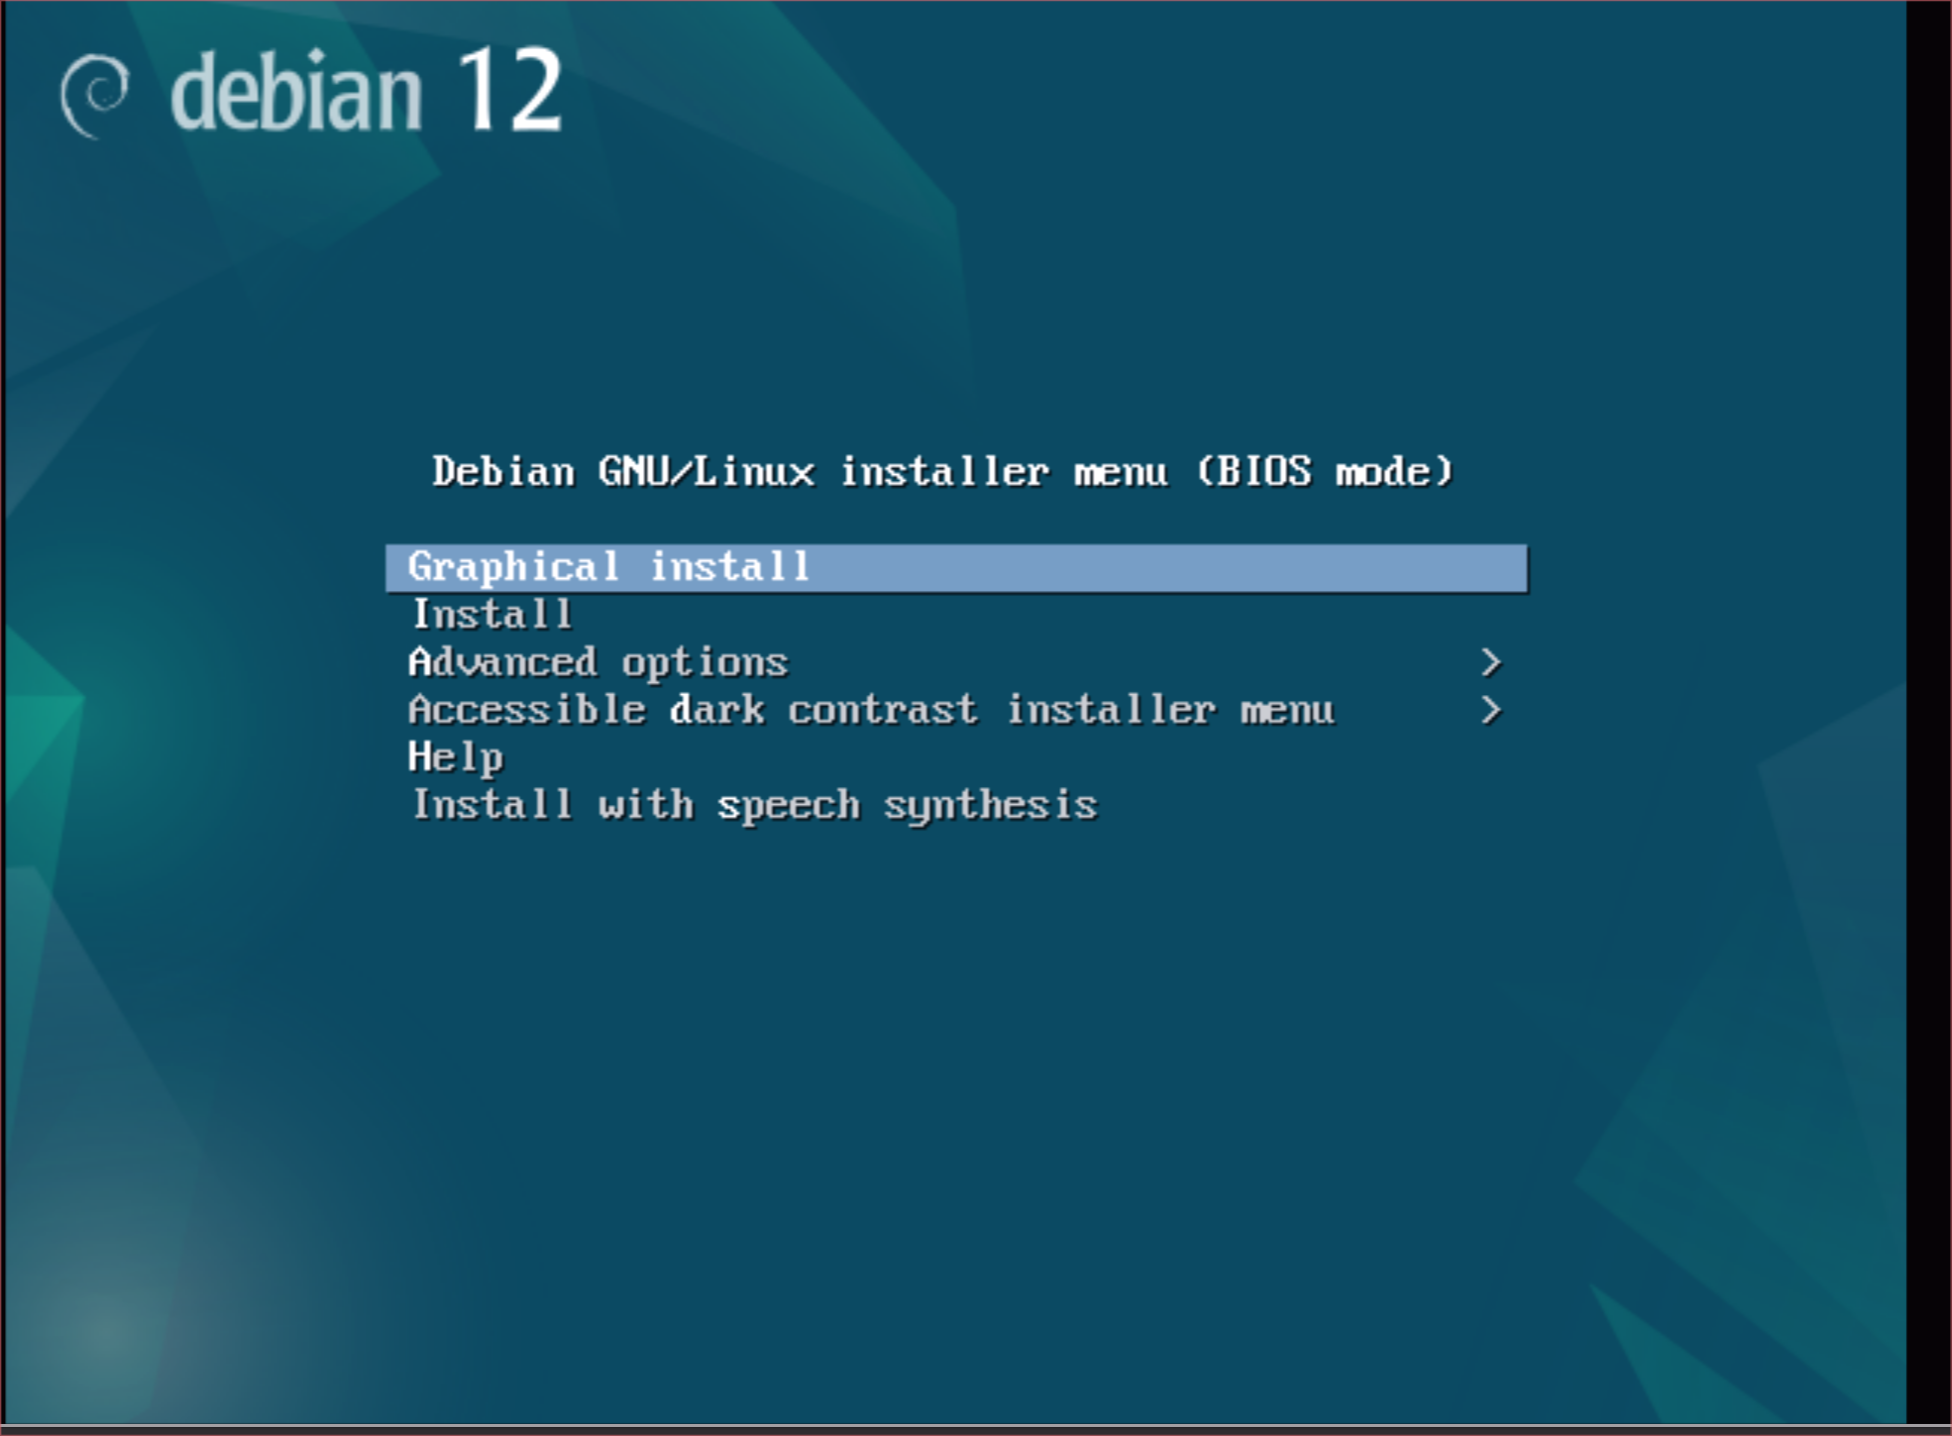
##### 1. After booting the ISO choose graphical install. Make sure there is a working network connection otherwise the install will not work.
##### [](https://bookstack.archfox.org/uploads/images/gallery/2025-02/FagHMcPc0buoebcH-image.png)
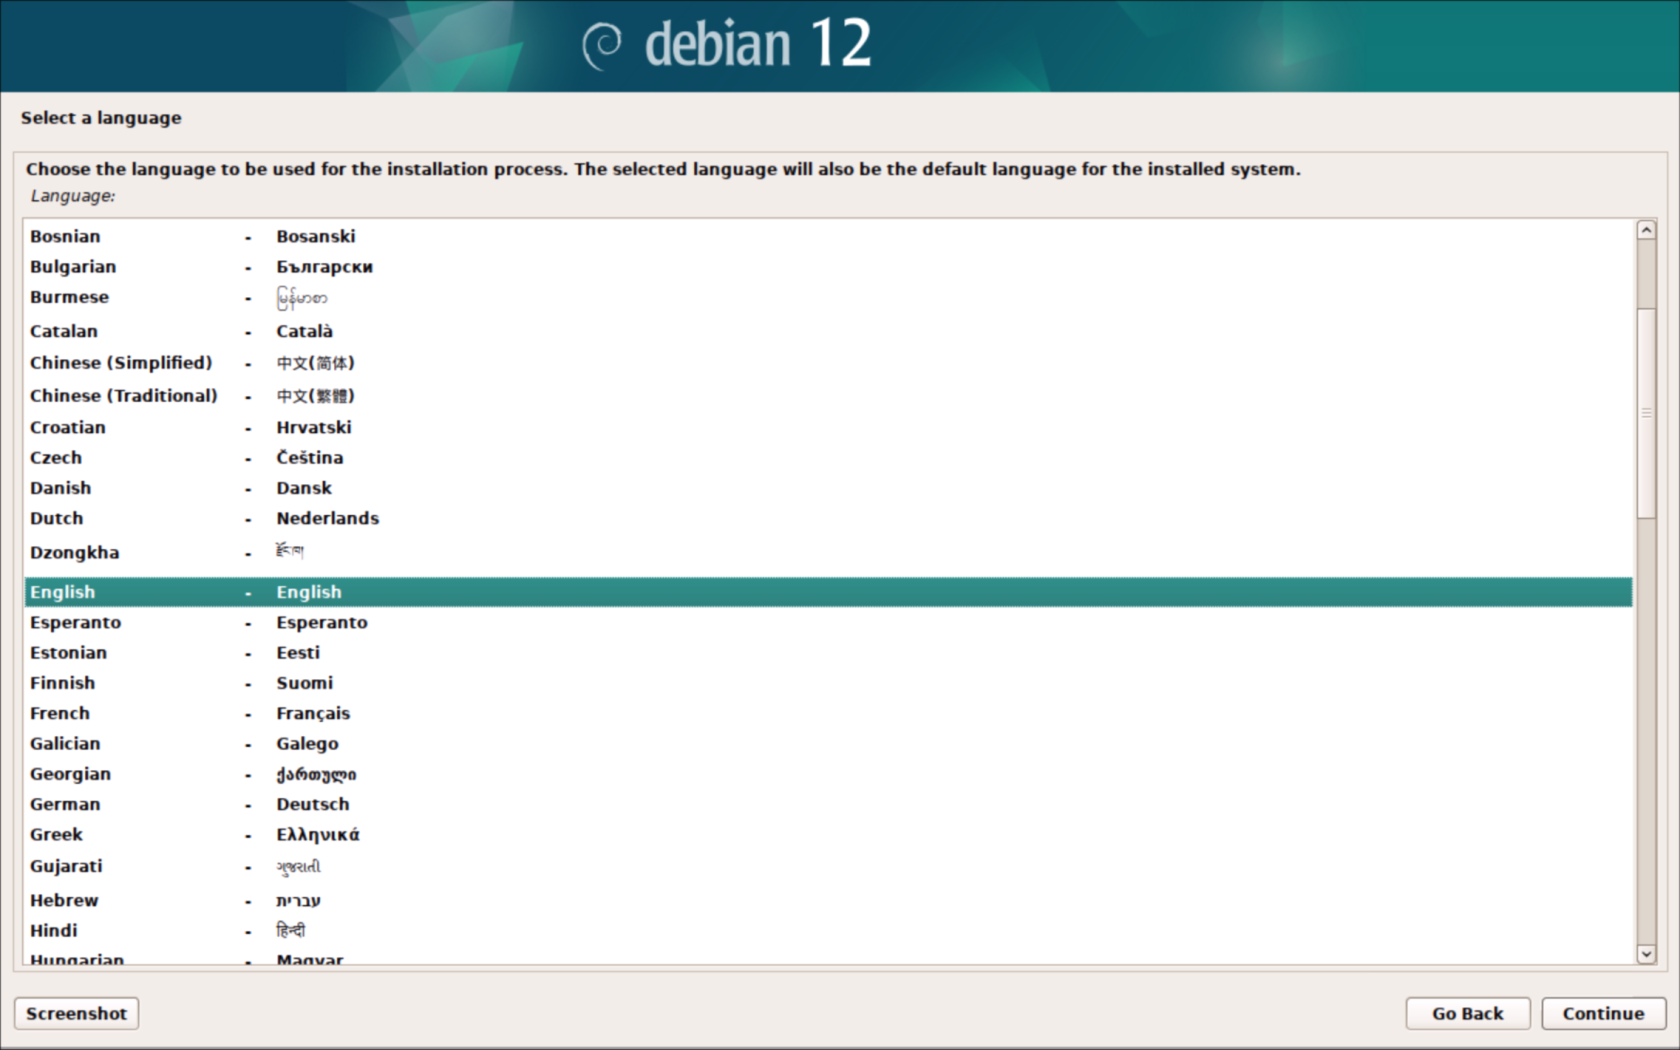
##### 2. English
##### [](https://bookstack.archfox.org/uploads/images/gallery/2025-02/CAJVLTMA3LaFdSxz-image.png)
##### 3. United States
##### [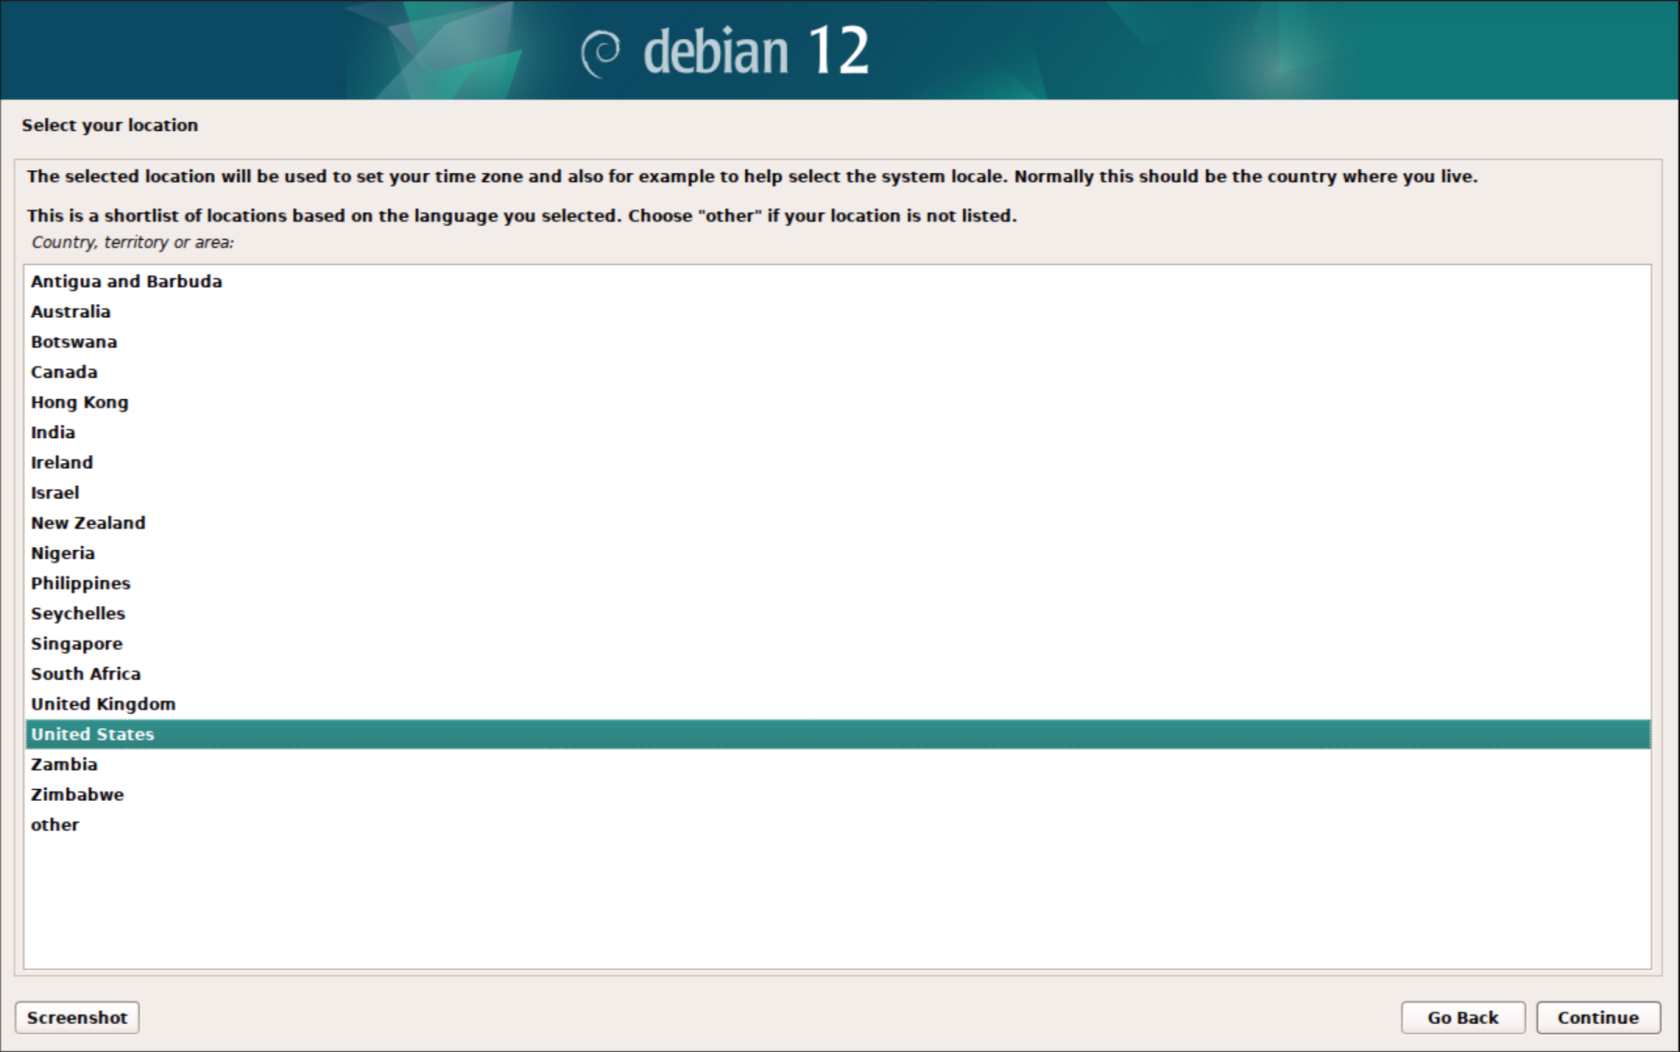](https://bookstack.archfox.org/uploads/images/gallery/2025-02/SBPnFkuwyC33V4B4-image.png)
##### 4. American English
##### [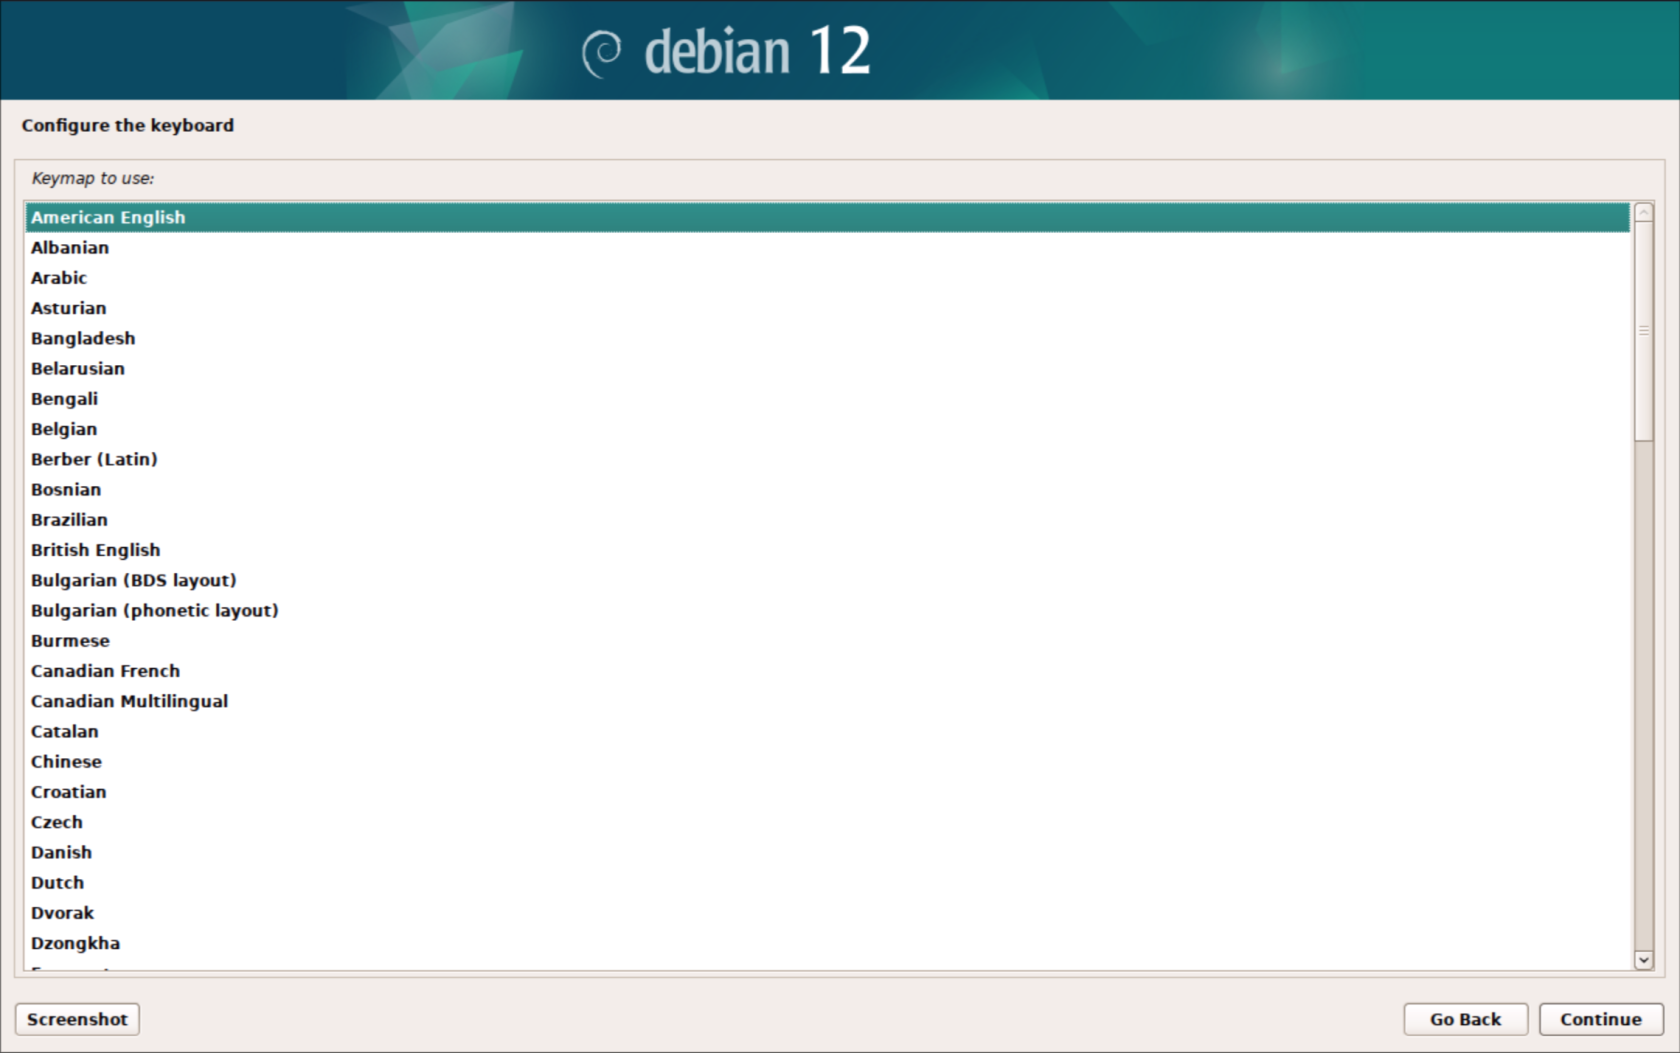](https://bookstack.archfox.org/uploads/images/gallery/2025-02/MMSBqFnQQJDh8Eoj-image.png)
##### 5. Enter SangomaPBX
##### [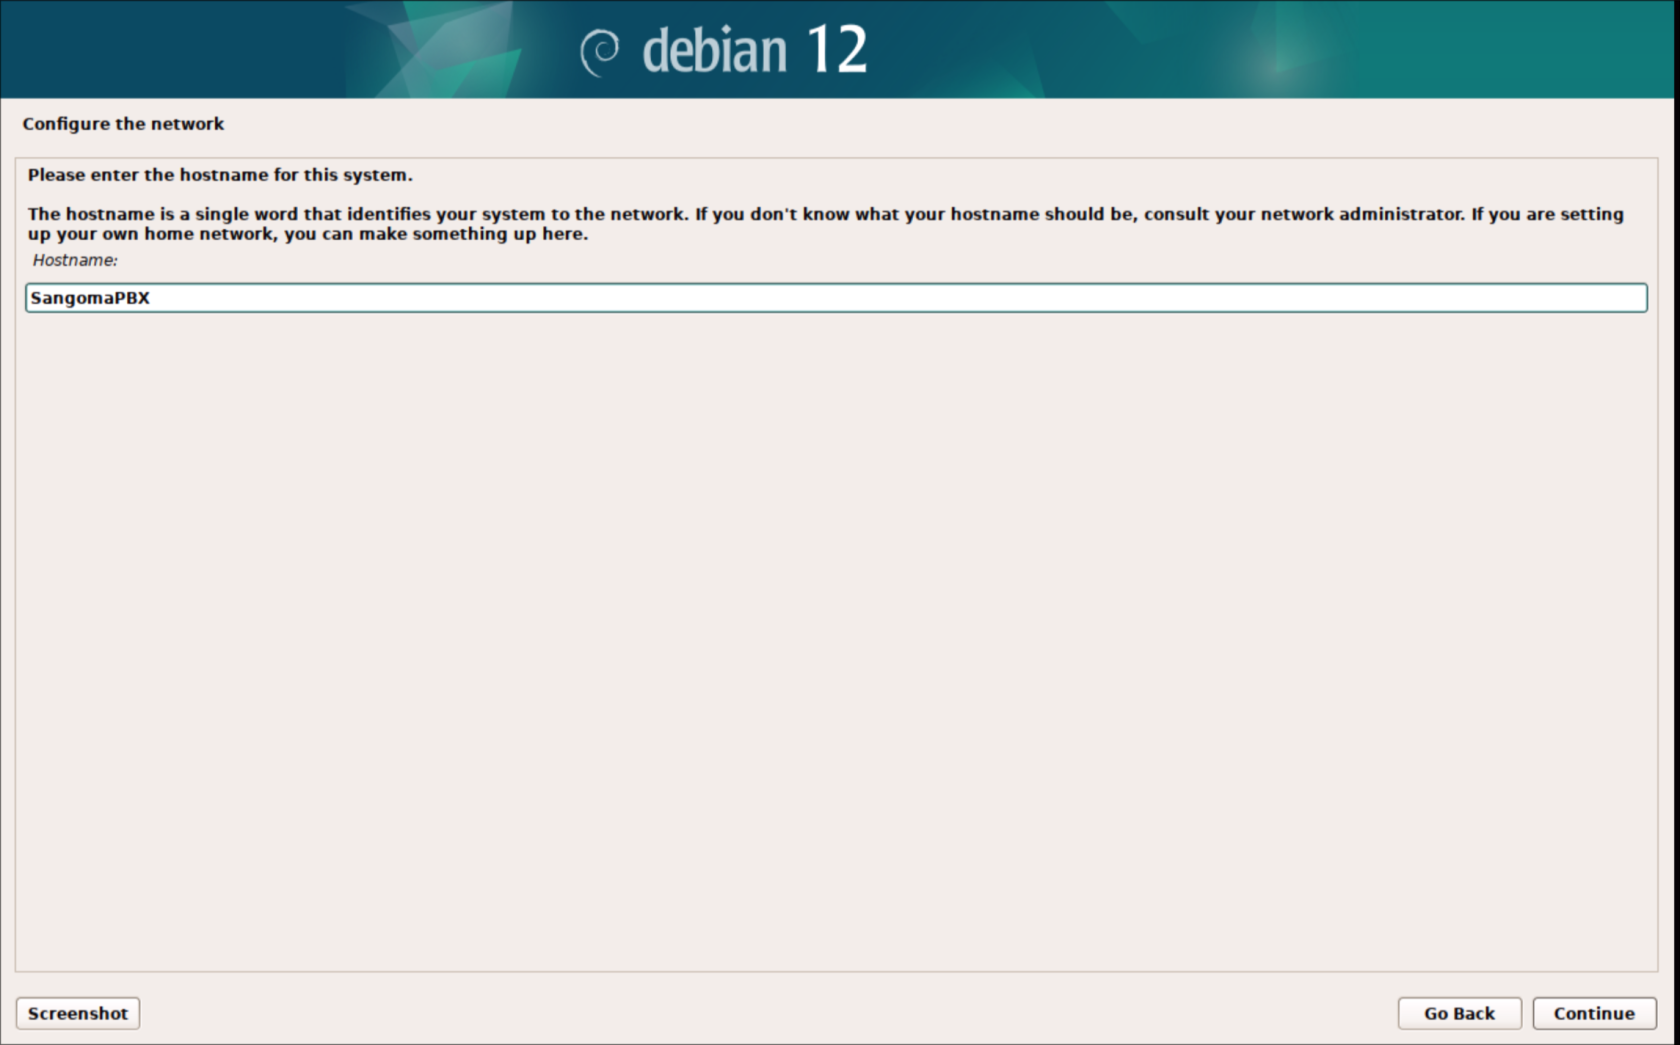](https://bookstack.archfox.org/uploads/images/gallery/2025-02/f1lqTZIhiQxMEtr6-image.png)
##### 6. Enter the domain of the network or just leave it blank.
##### [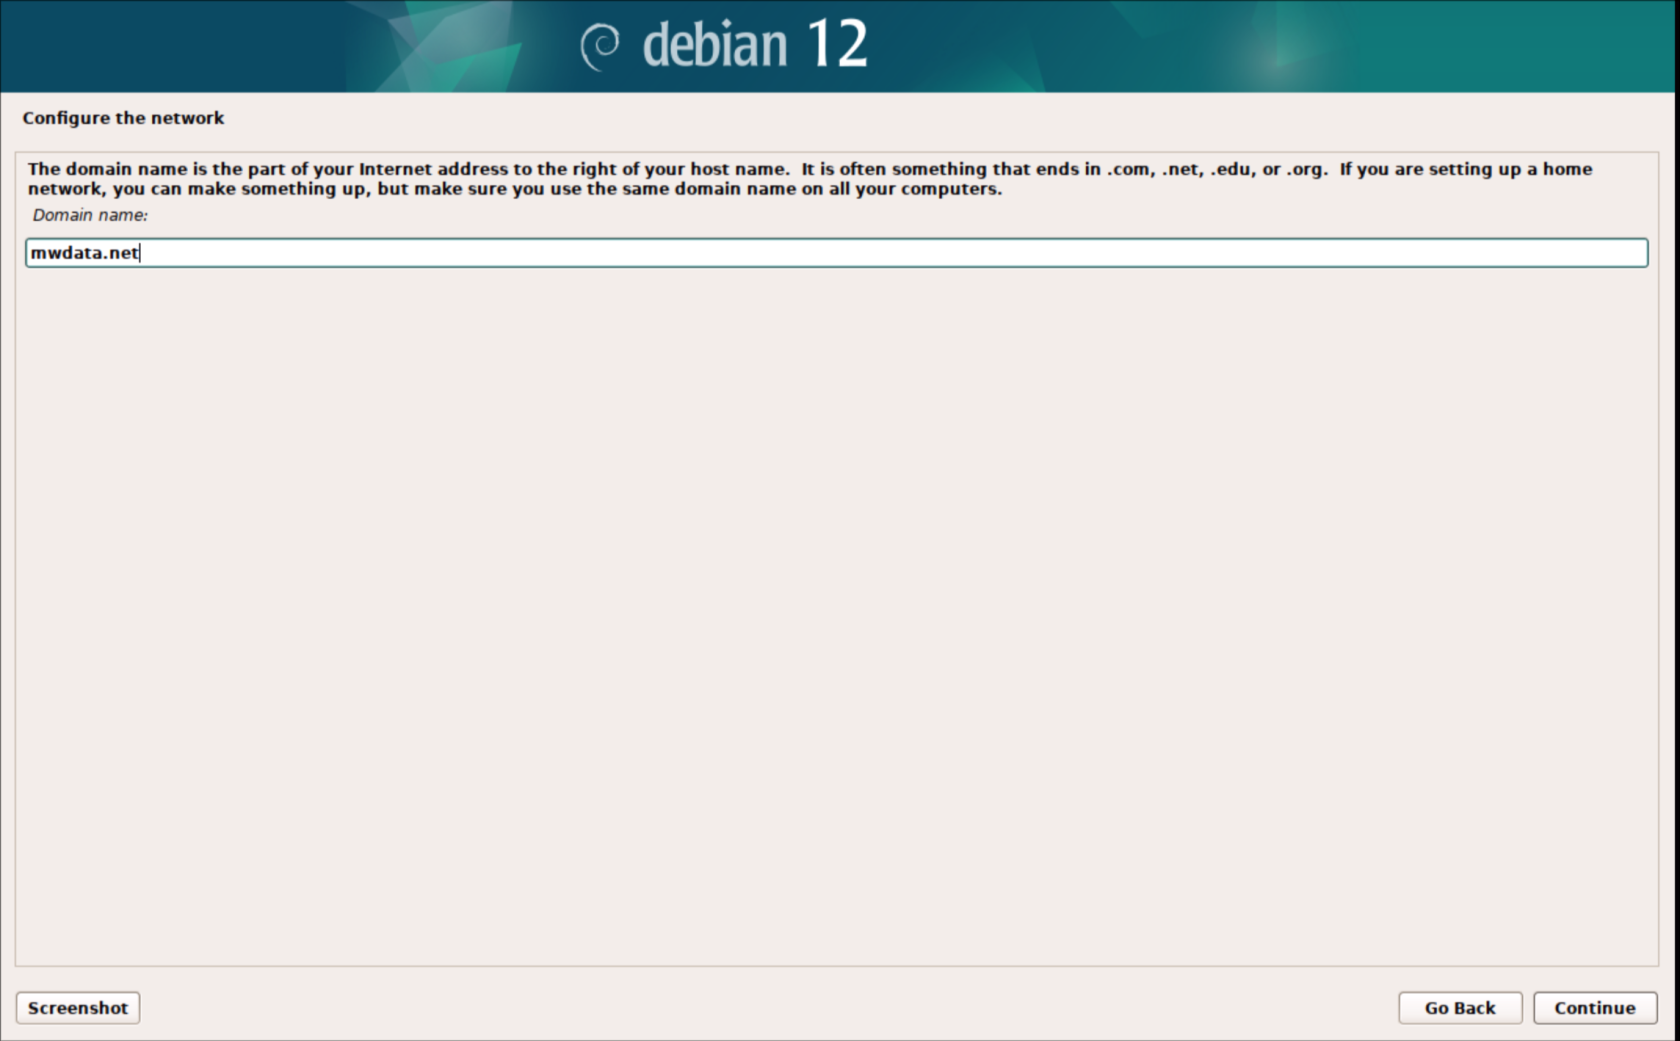](https://bookstack.archfox.org/uploads/images/gallery/2025-02/Sn1O4Jxd0E0xLH6G-image.png)
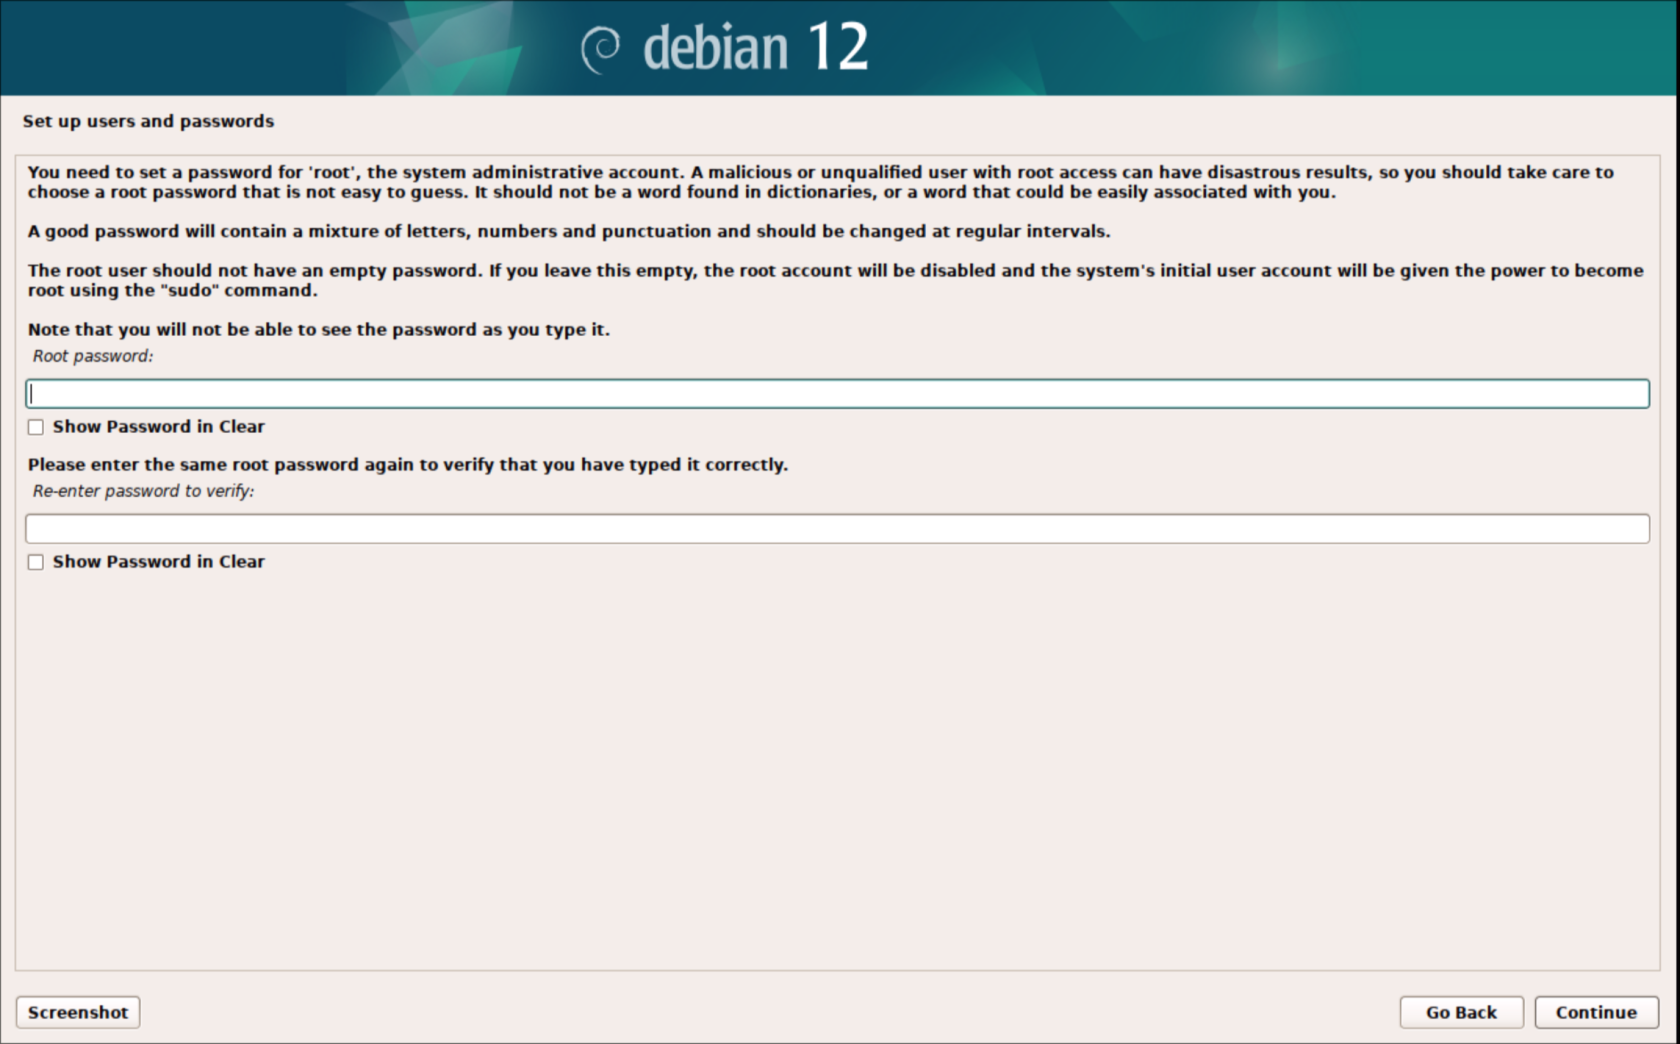
##### 7. Create a password for the Root user that will also be used for the login user that will be created later
##### [](https://bookstack.archfox.org/uploads/images/gallery/2025-02/PXPl0VYtJgh4n44Q-image.png)
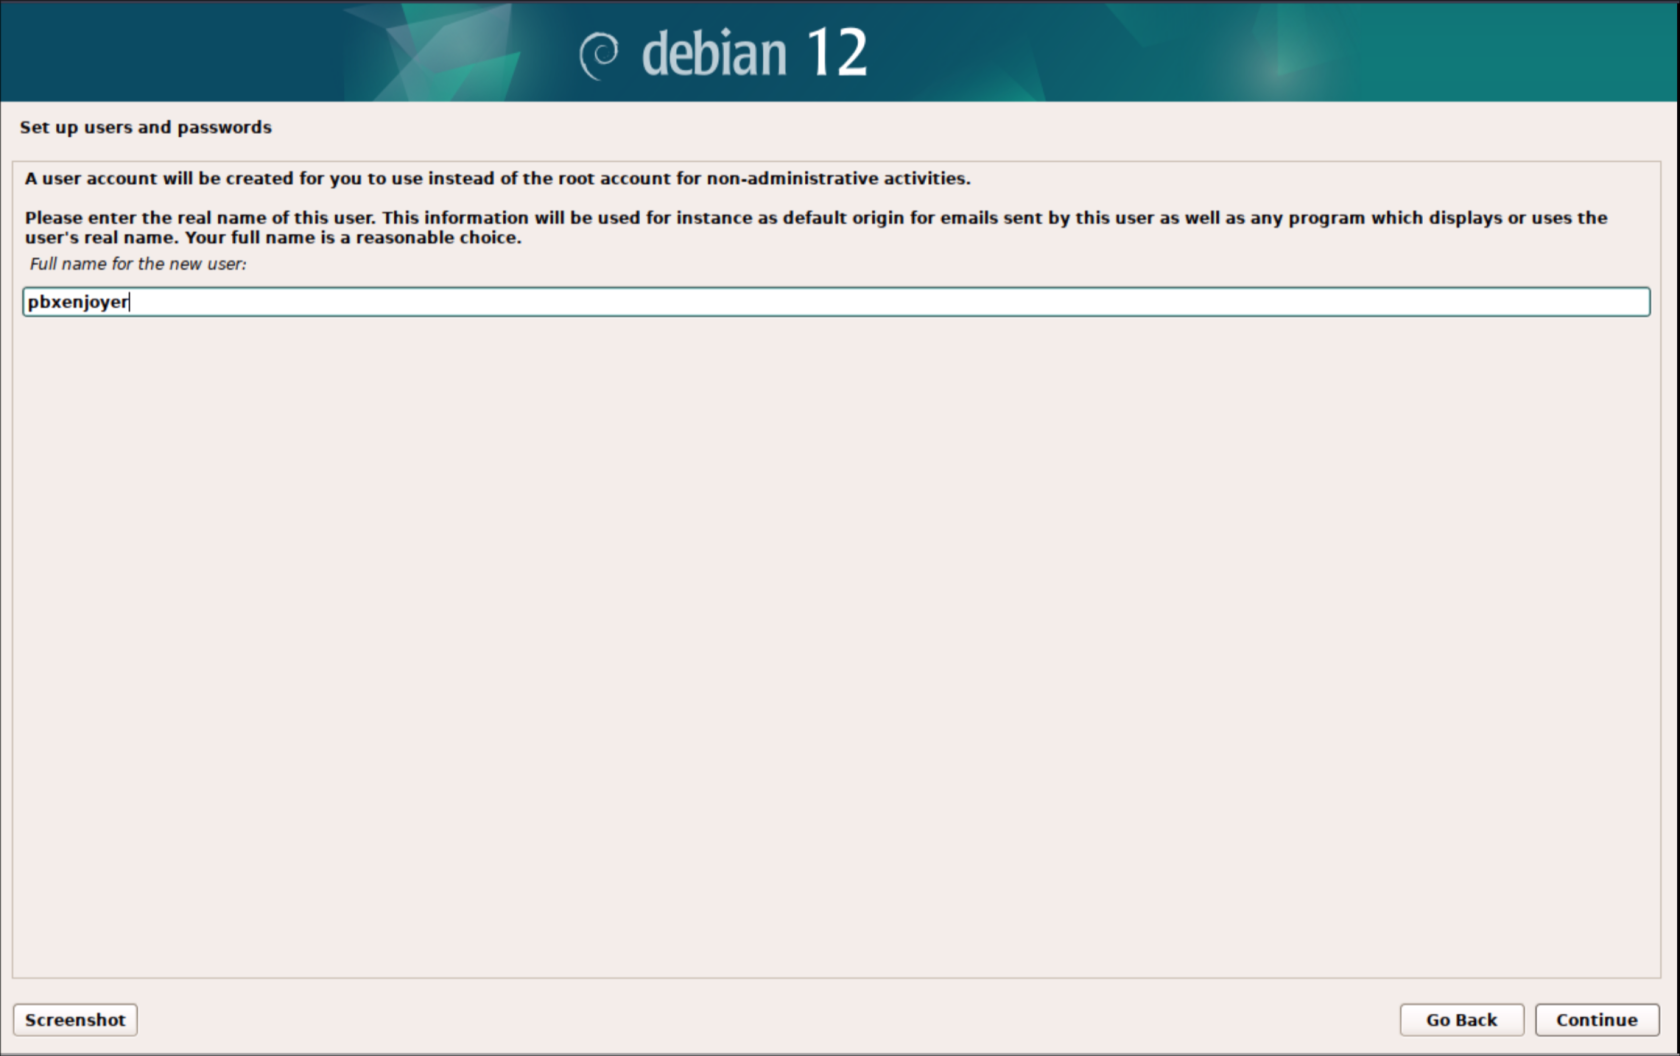
##### 8. This will be the main user that will login with ssh make sure to record this username
##### [](https://bookstack.archfox.org/uploads/images/gallery/2025-02/DoOYZrrPuhN978Mk-image.png)
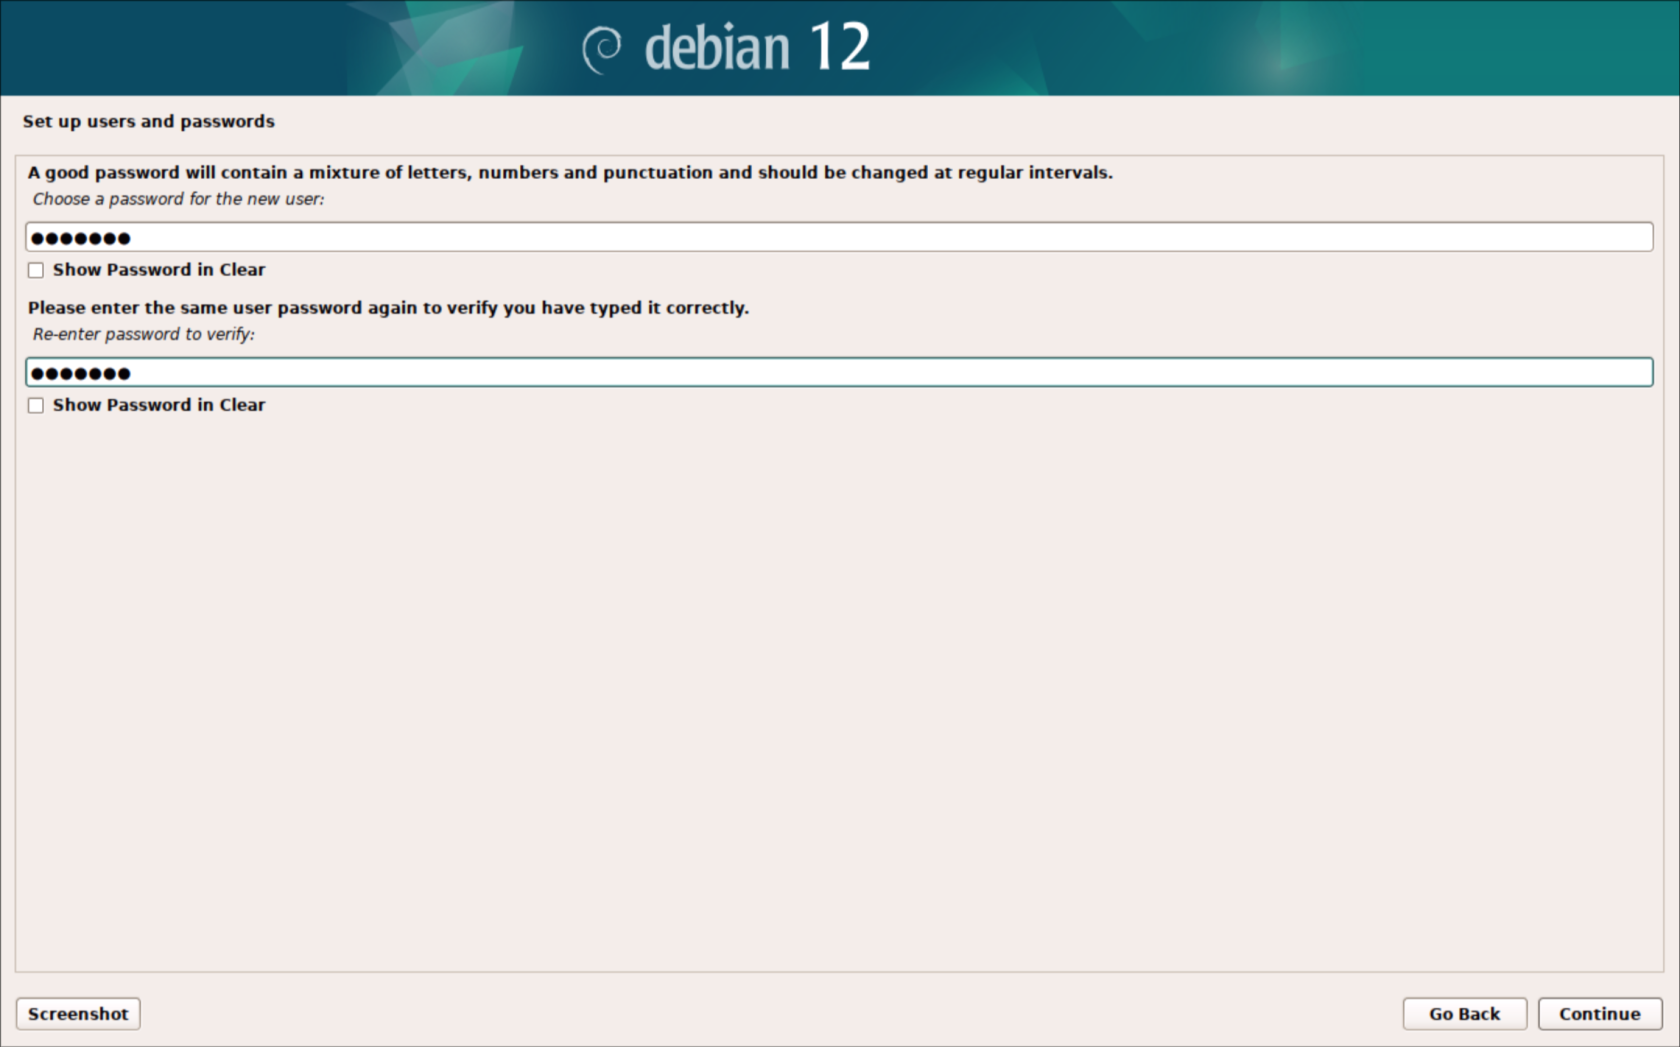
##### 9. Use the same password as used for the root account
##### [](https://bookstack.archfox.org/uploads/images/gallery/2025-02/sqiLytix2wletVTU-image.png)
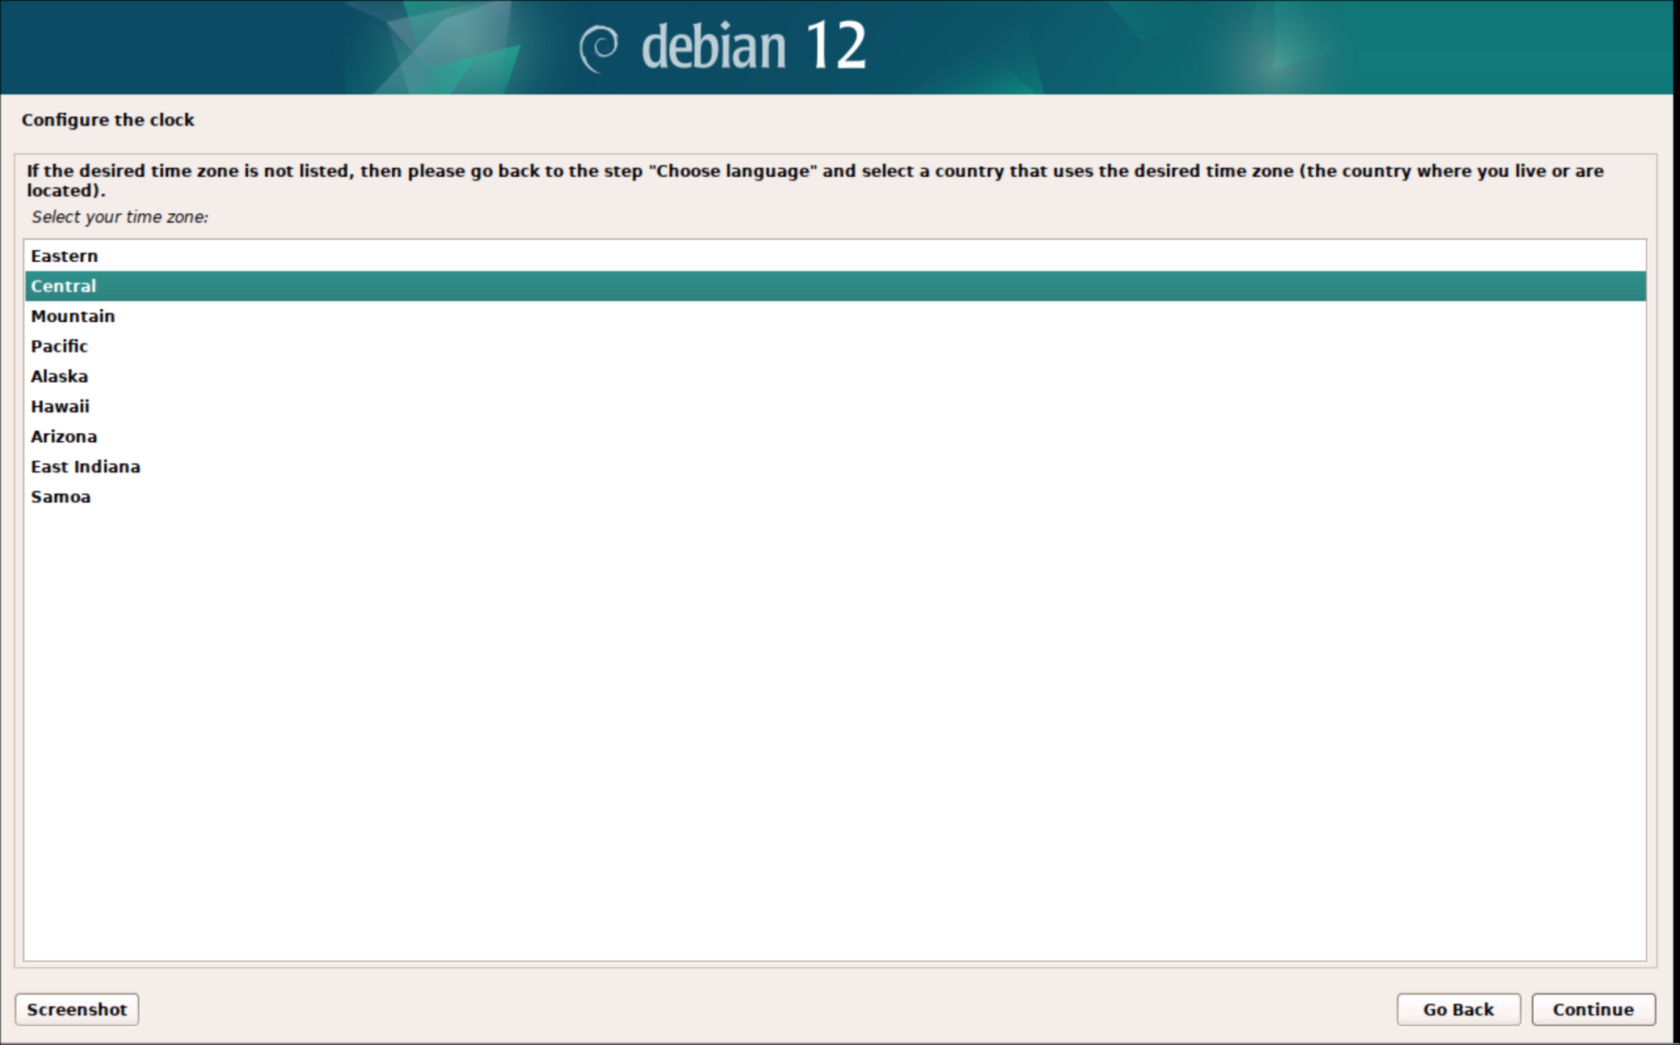
##### 10. Usually Central
##### [](https://bookstack.archfox.org/uploads/images/gallery/2025-02/BLRSS8gcnXWIPPbh-image.png)
##### 11. Choose "use entire disk"
##### [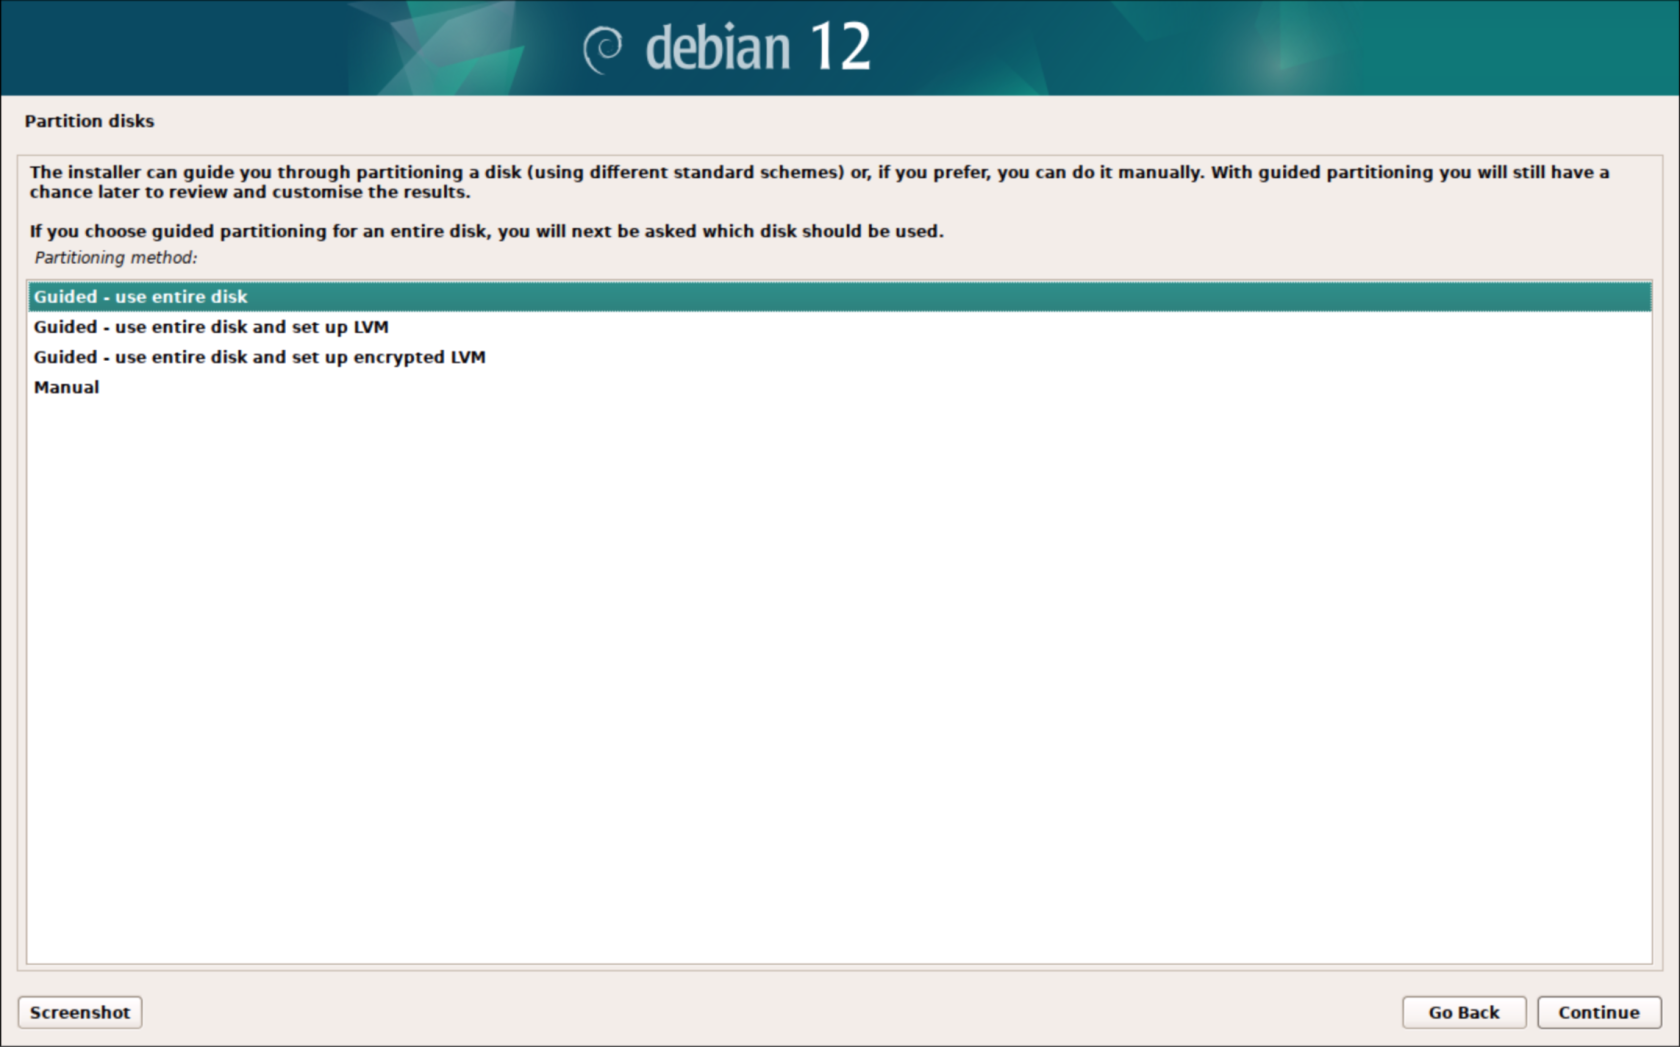](https://bookstack.archfox.org/uploads/images/gallery/2025-02/5v3DIuEAKsBT7mcB-image.png)
##### 12. In a VM there should only be 1 option
##### [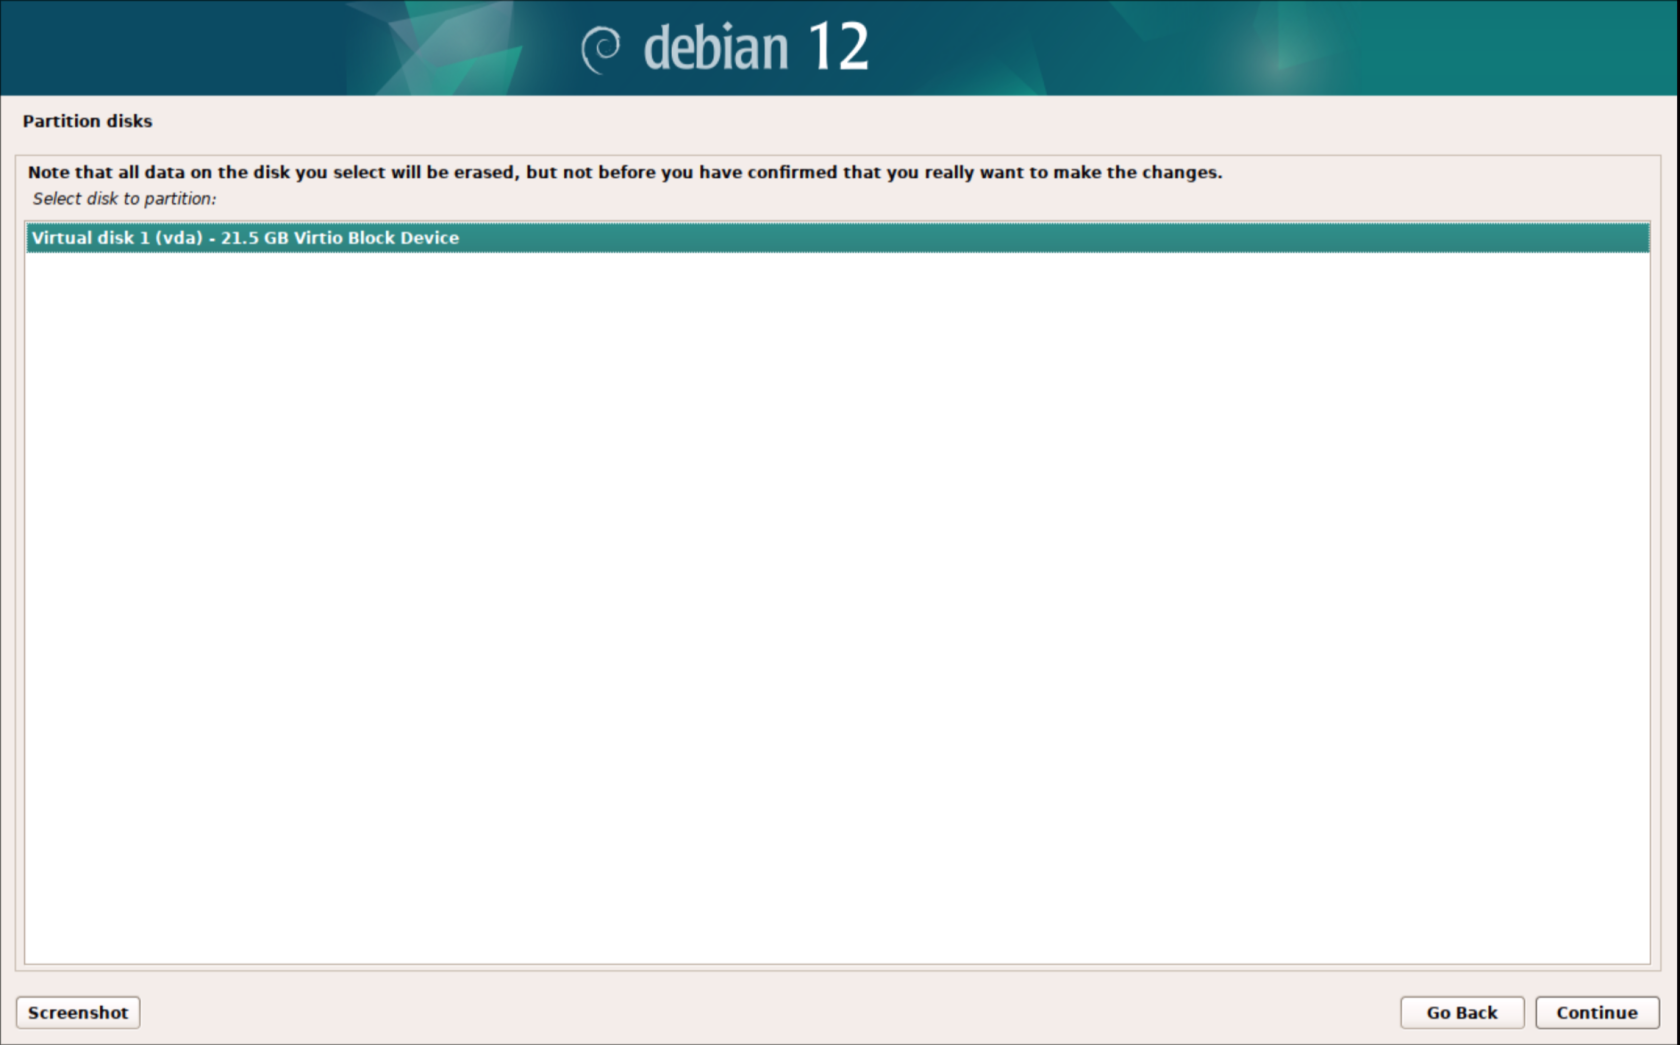](https://bookstack.archfox.org/uploads/images/gallery/2025-02/fKKQHTF8wD7ADaNO-image.png)
##### 13. All files in 1 partition
##### [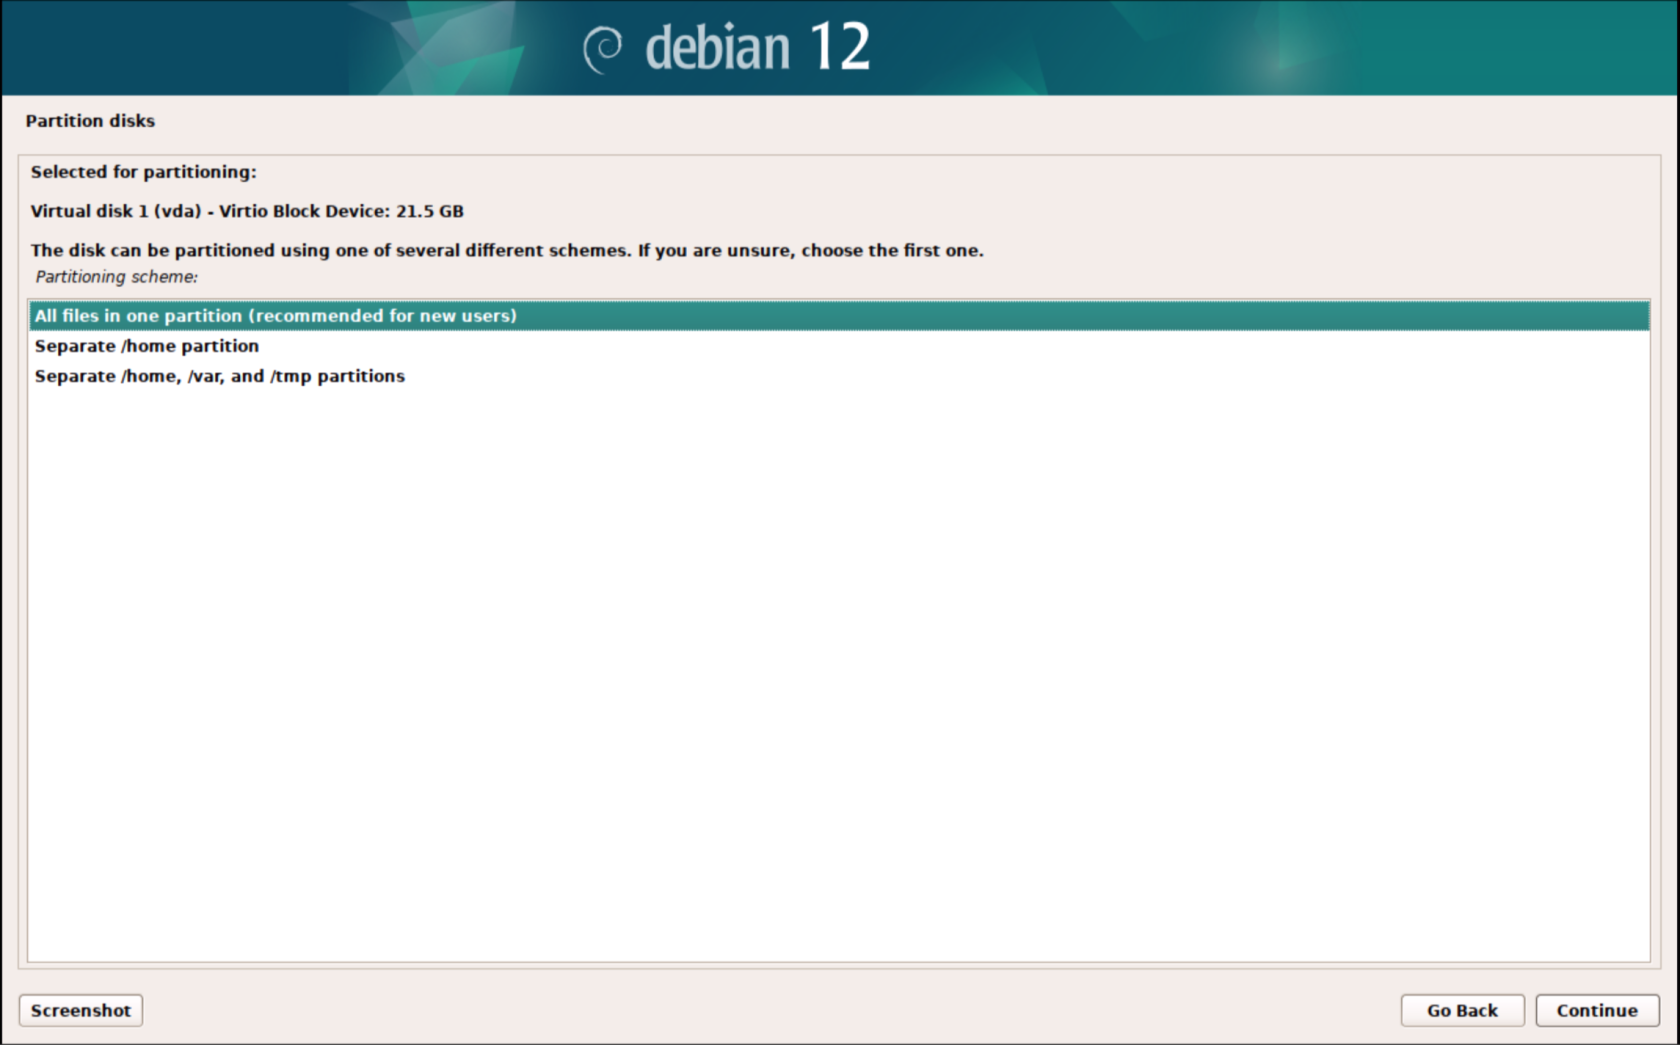](https://bookstack.archfox.org/uploads/images/gallery/2025-02/FQHkRg8hjMlCntw6-image.png)
##### 14. Finish partitioning
##### [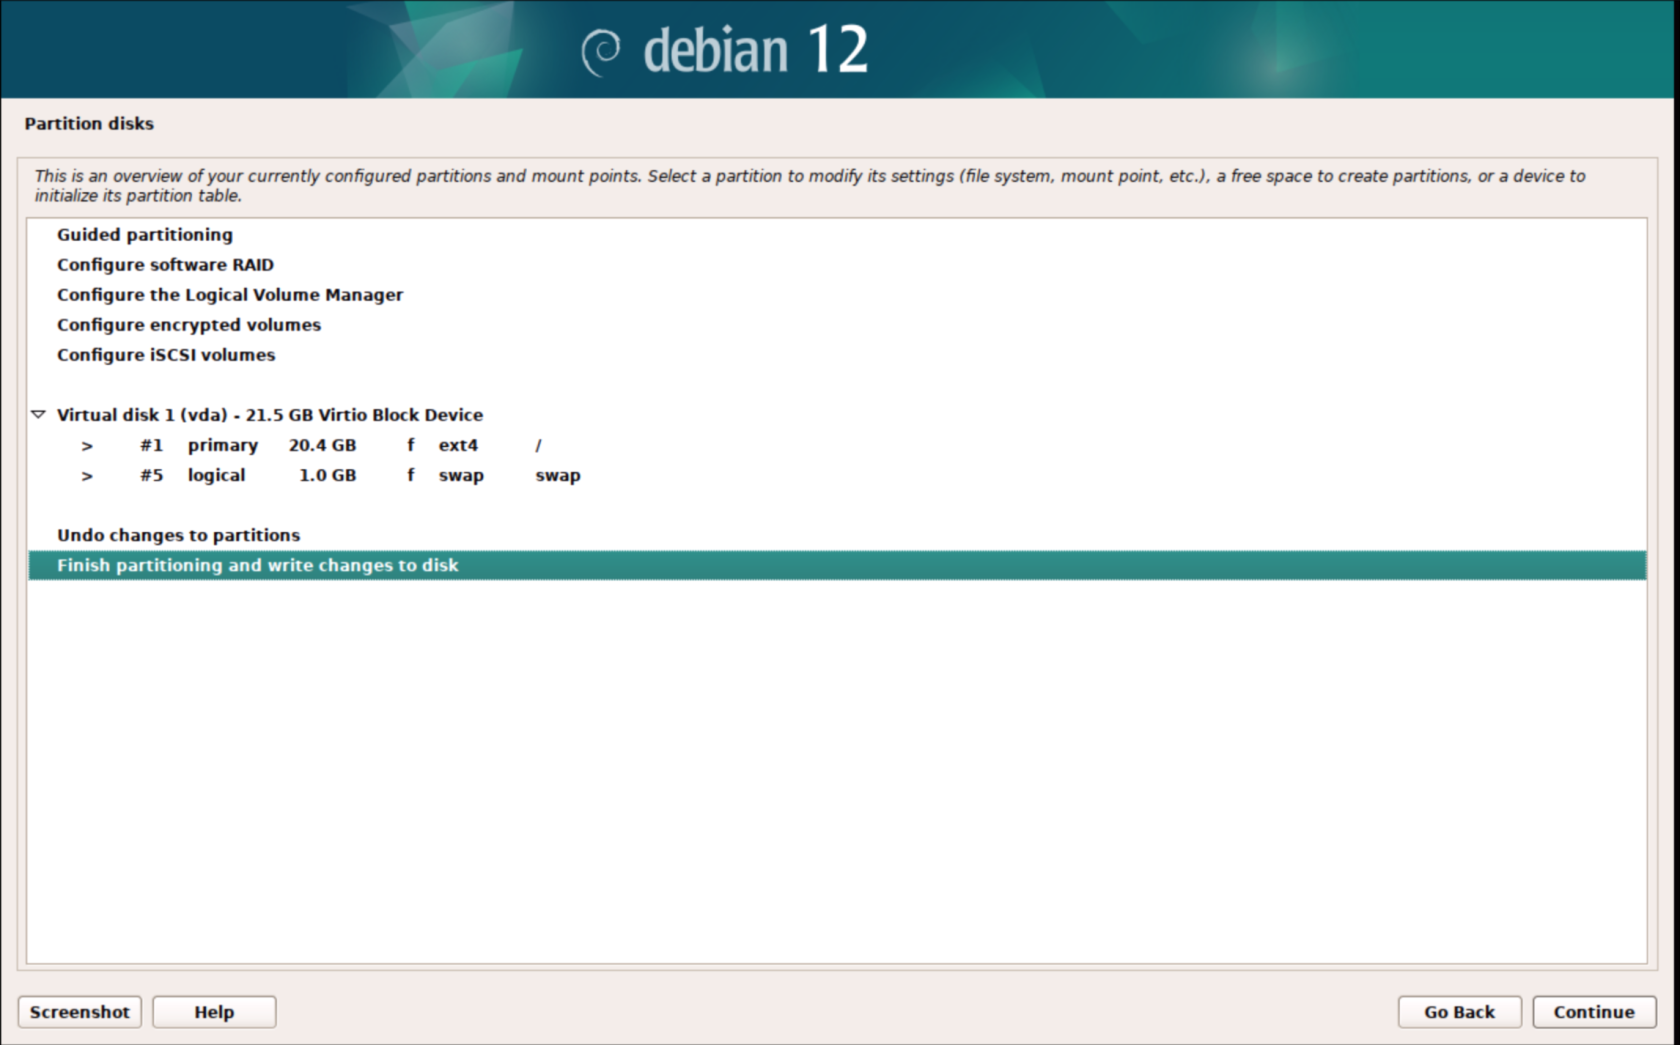](https://bookstack.archfox.org/uploads/images/gallery/2025-02/PDy3ifAhRl0YyIC2-image.png)
##### 15. Make sure to change this to Yes and continue
##### [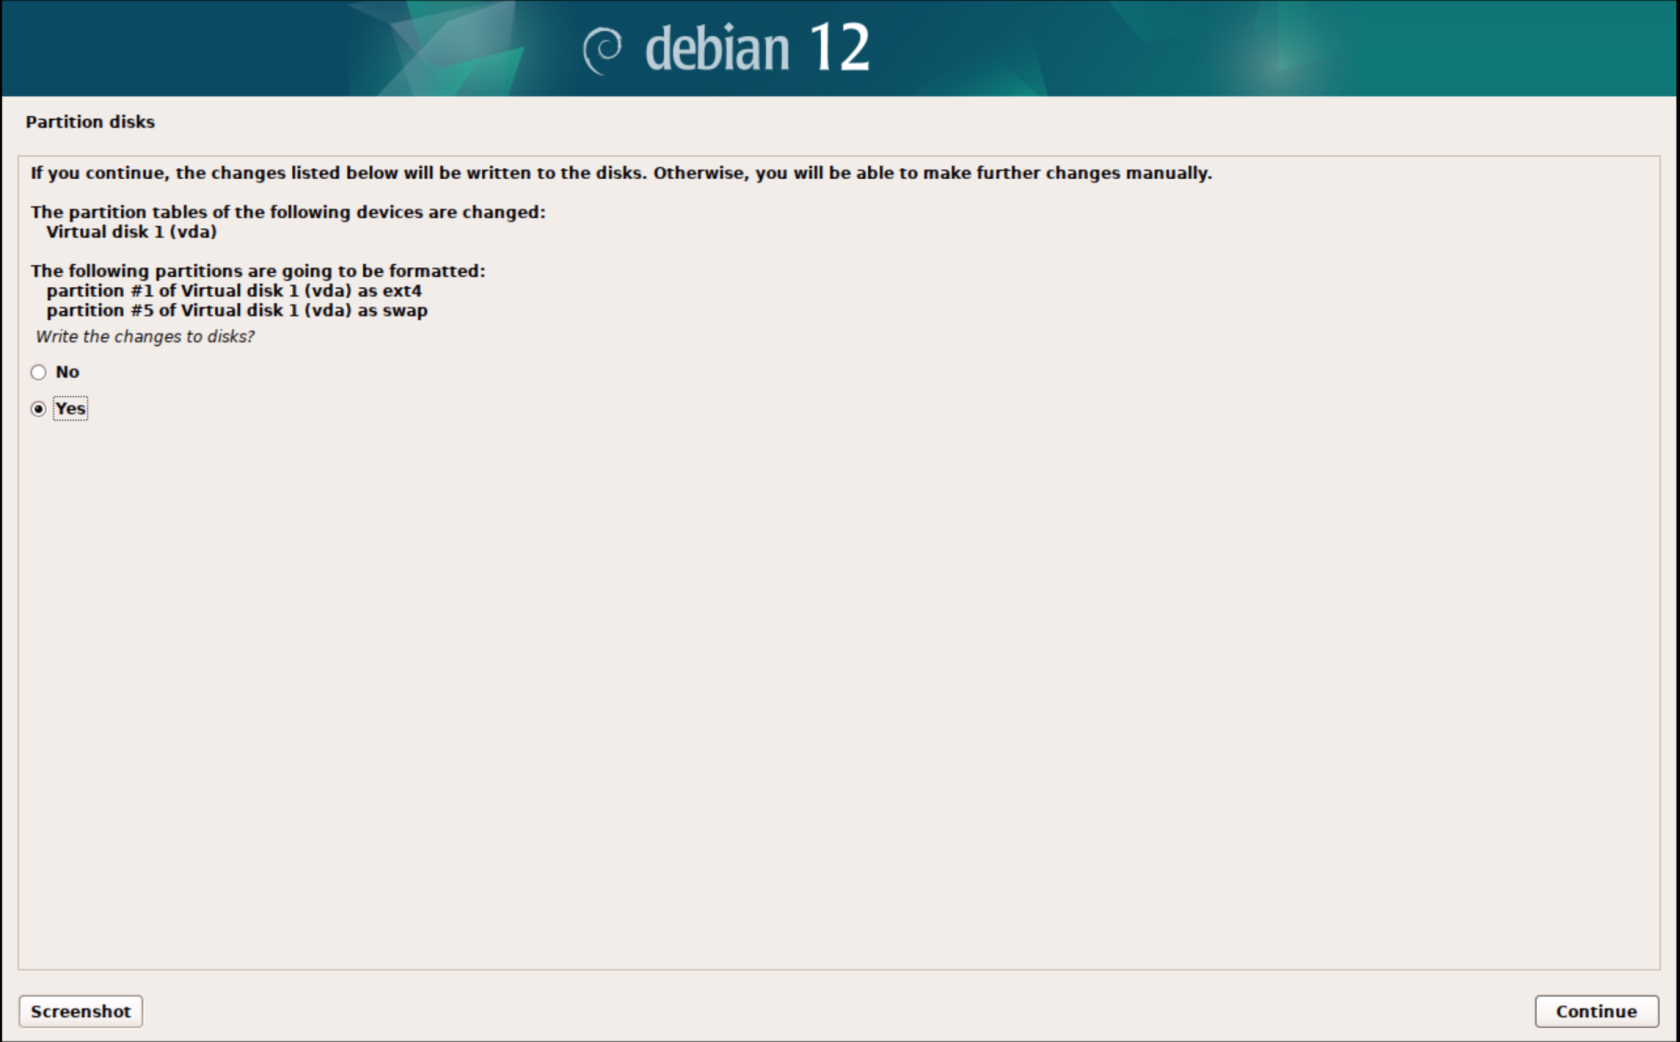](https://bookstack.archfox.org/uploads/images/gallery/2025-02/ueDGRP2wKyy3fHuI-image.png)
##### 16. Do not scan for additional media
##### [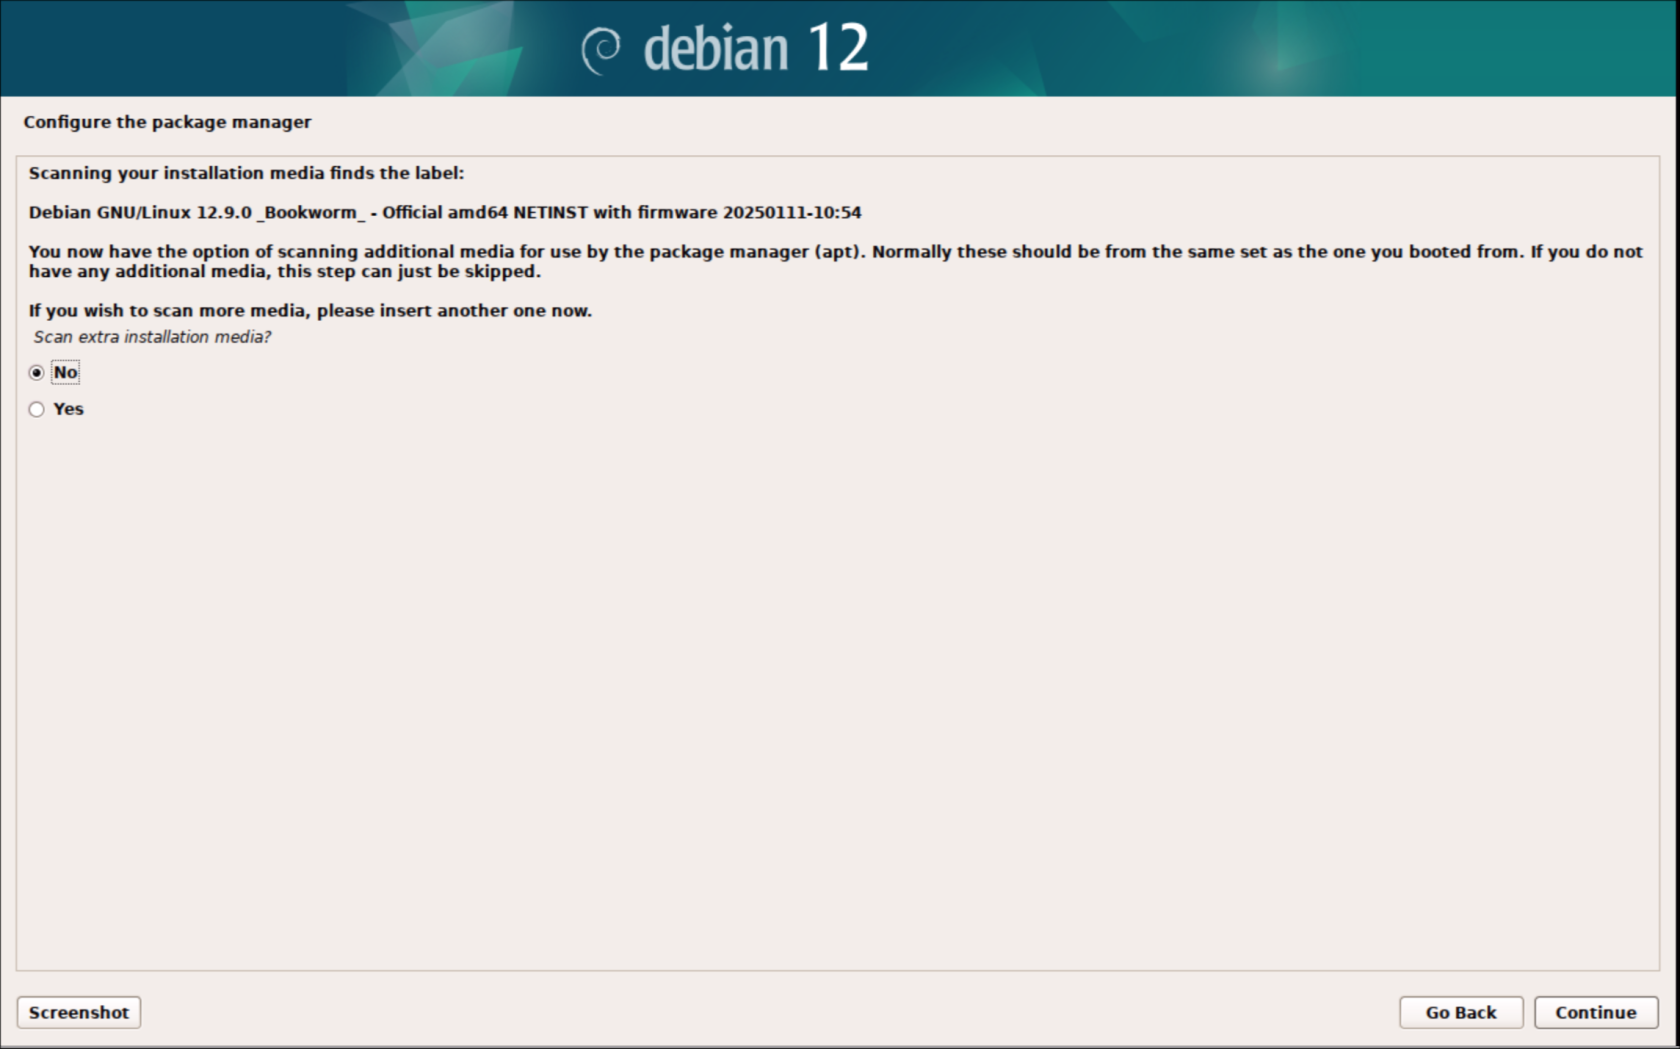](https://bookstack.archfox.org/uploads/images/gallery/2025-02/WteIrsQS76nb0rTp-image.png)
##### 17. Choose United States
##### [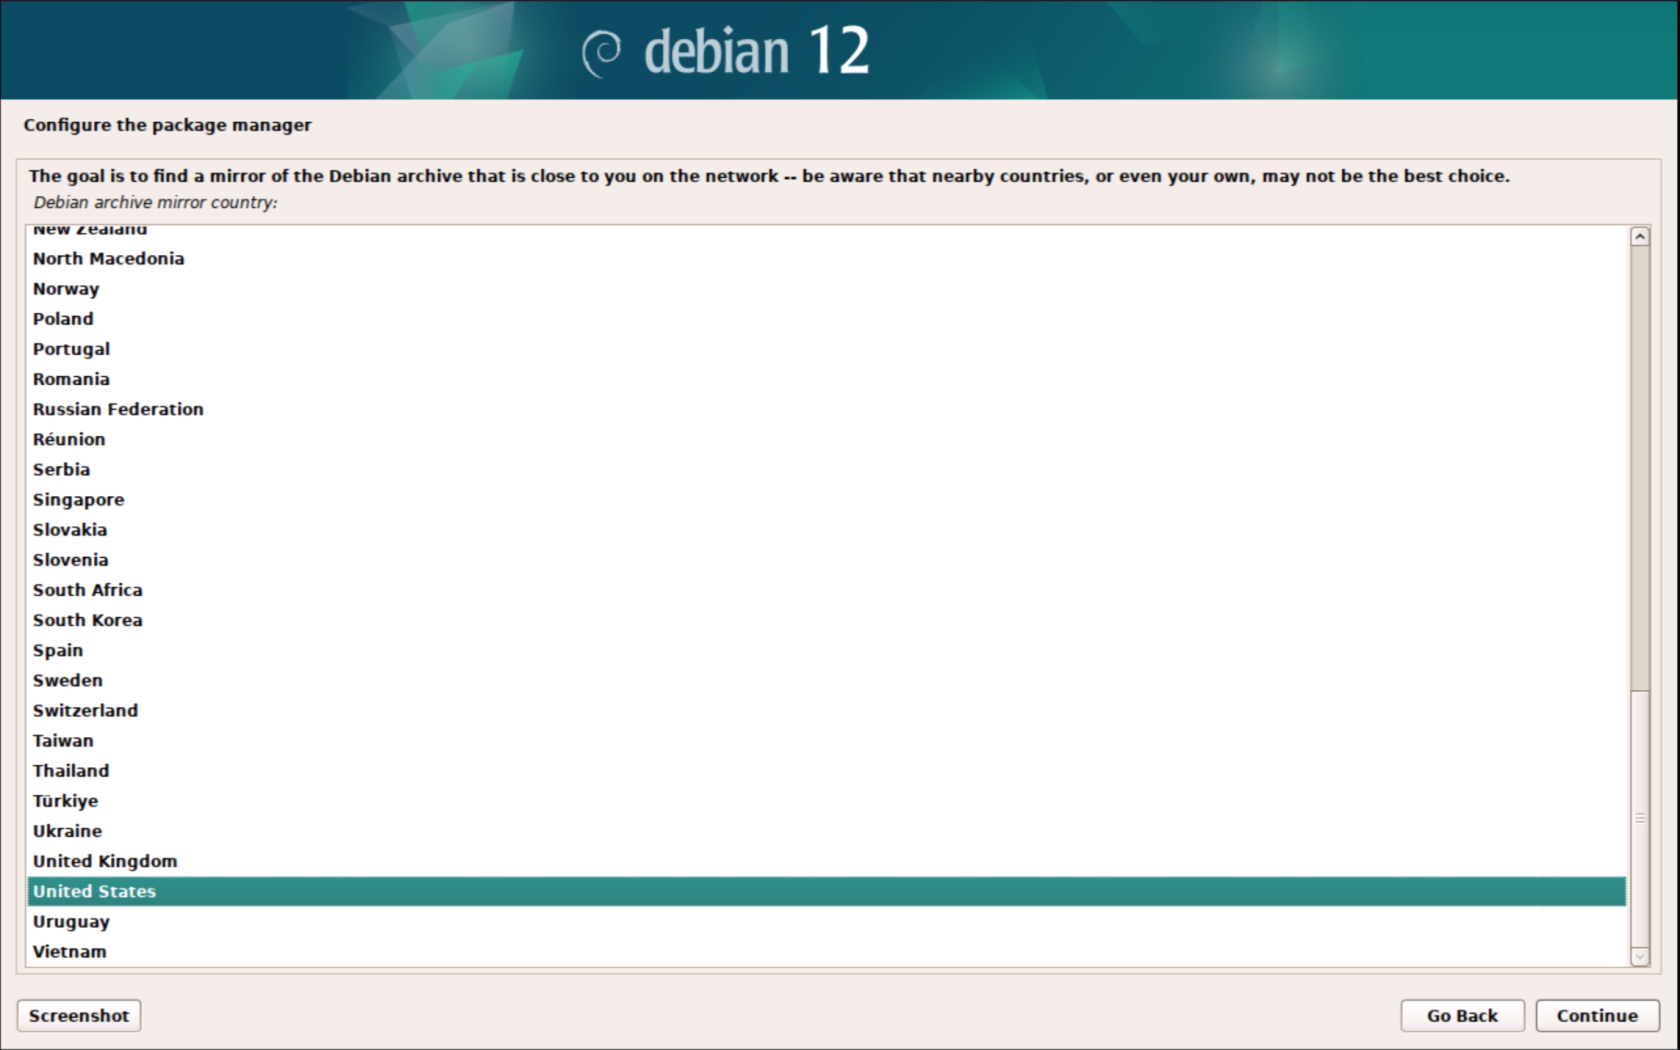](https://bookstack.archfox.org/uploads/images/gallery/2025-02/6GngznYPLFzsegSU-image.png)
##### 18. Choose deb.debian.org
##### [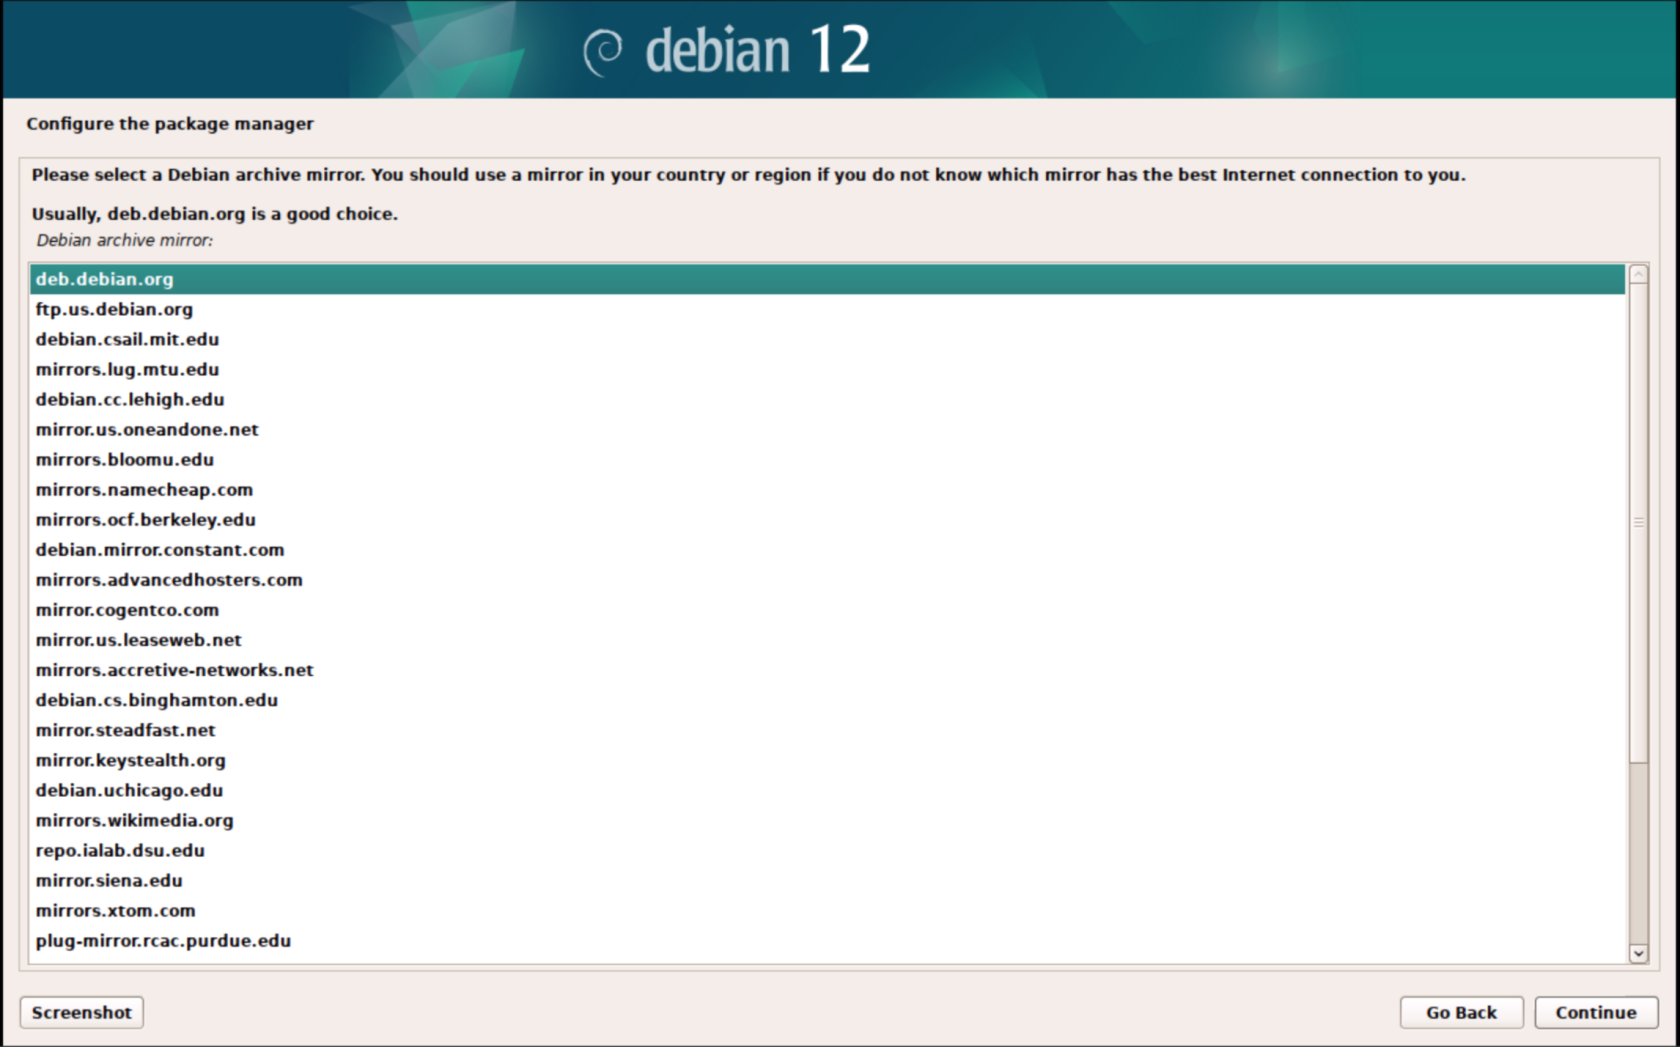](https://bookstack.archfox.org/uploads/images/gallery/2025-02/jqMT91BV4oNeHkR4-image.png)
##### 19. No proxy is needed leave it blank and click continue
##### [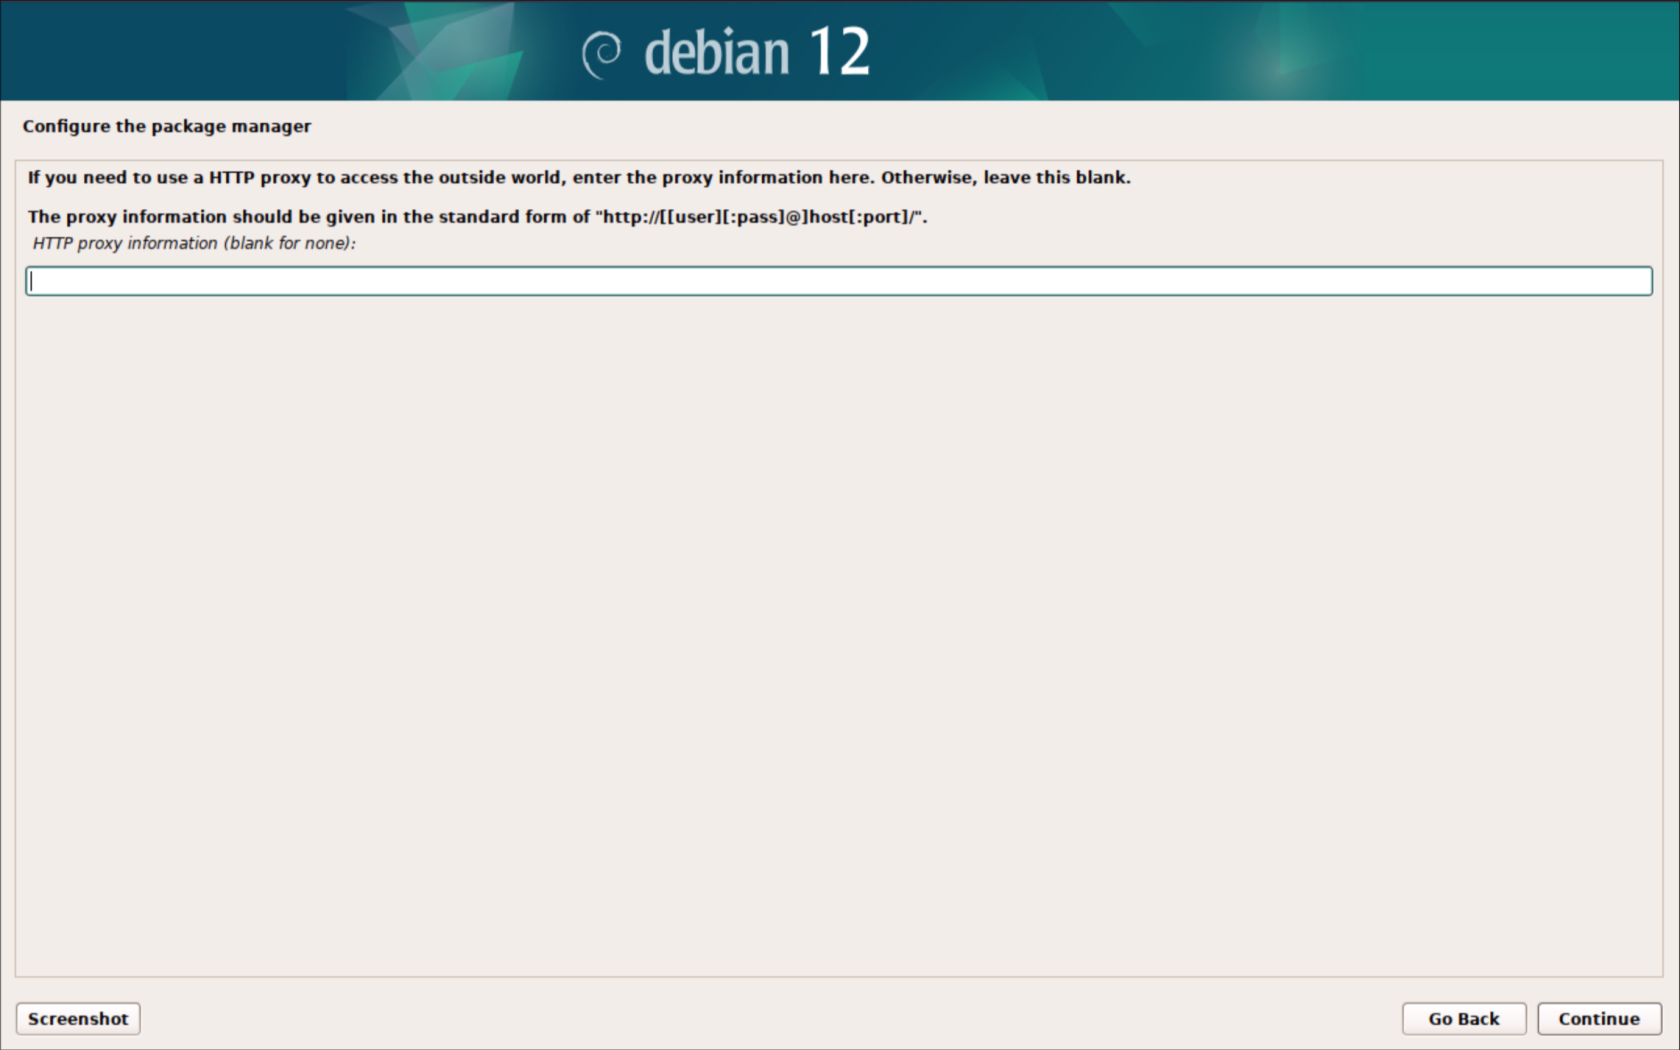](https://bookstack.archfox.org/uploads/images/gallery/2025-02/SOYgTils9CTYMoIs-image.png)
##### 20. Choose No and continue
##### [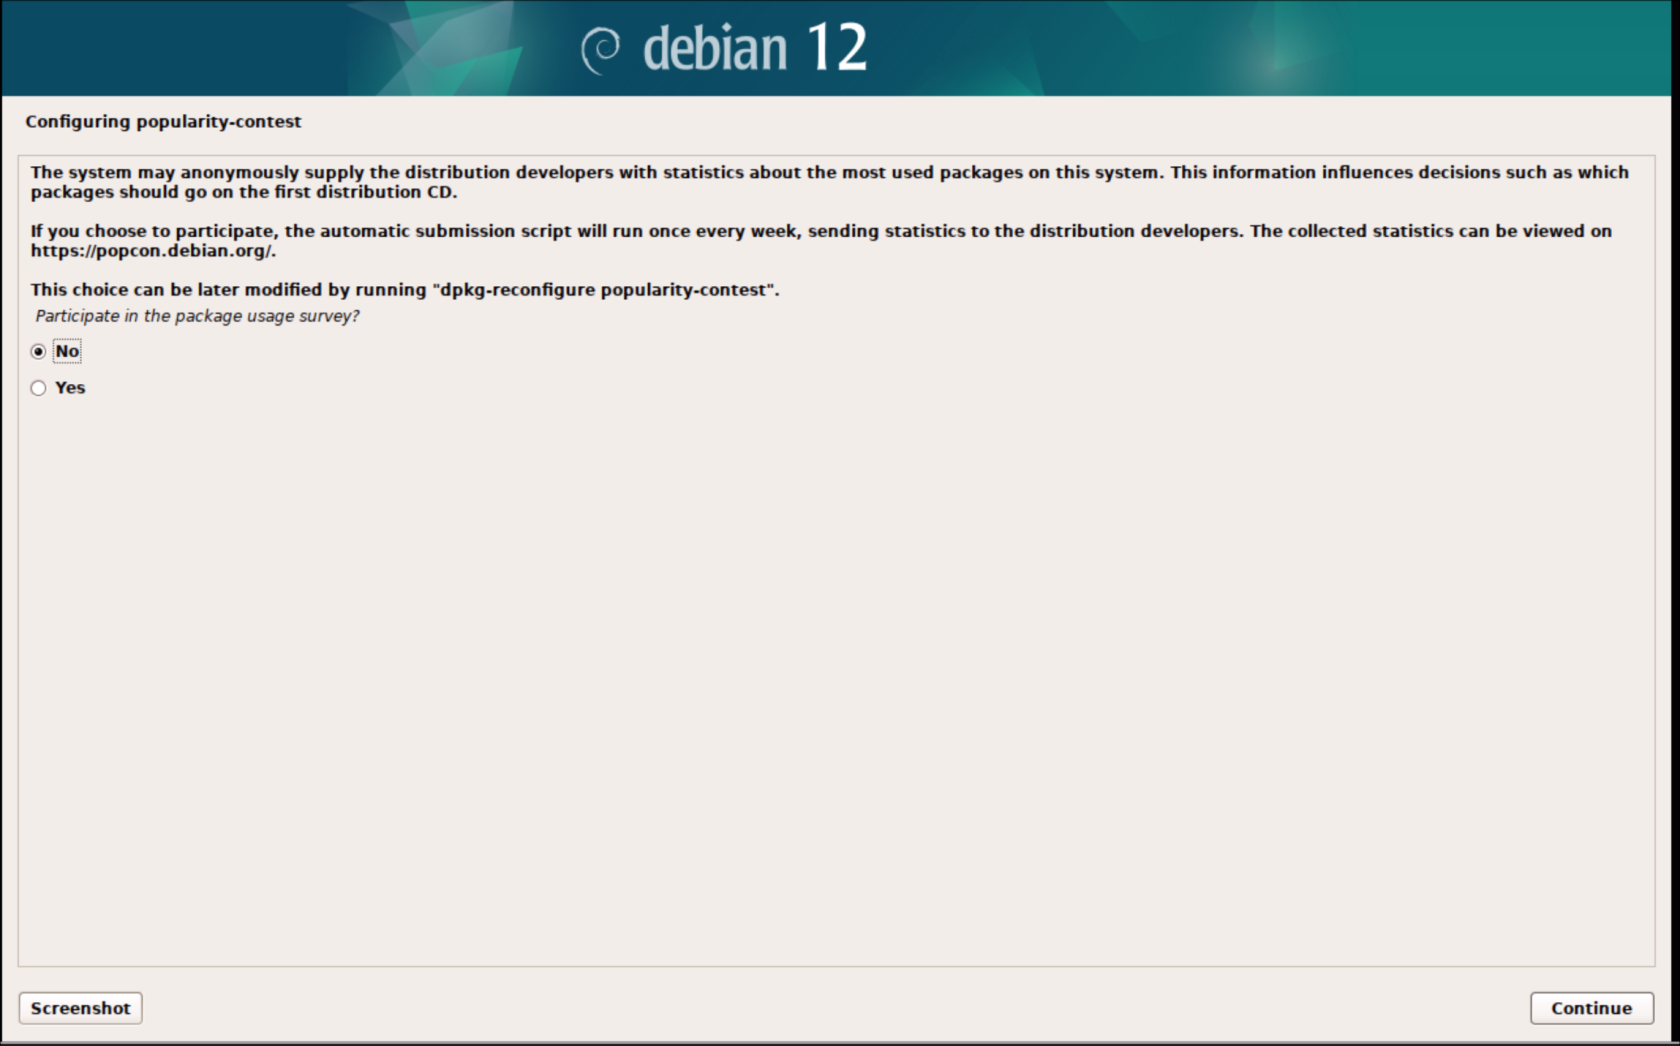](https://bookstack.archfox.org/uploads/images/gallery/2025-02/dqwvb8zAXxV7NWmt-image.png)
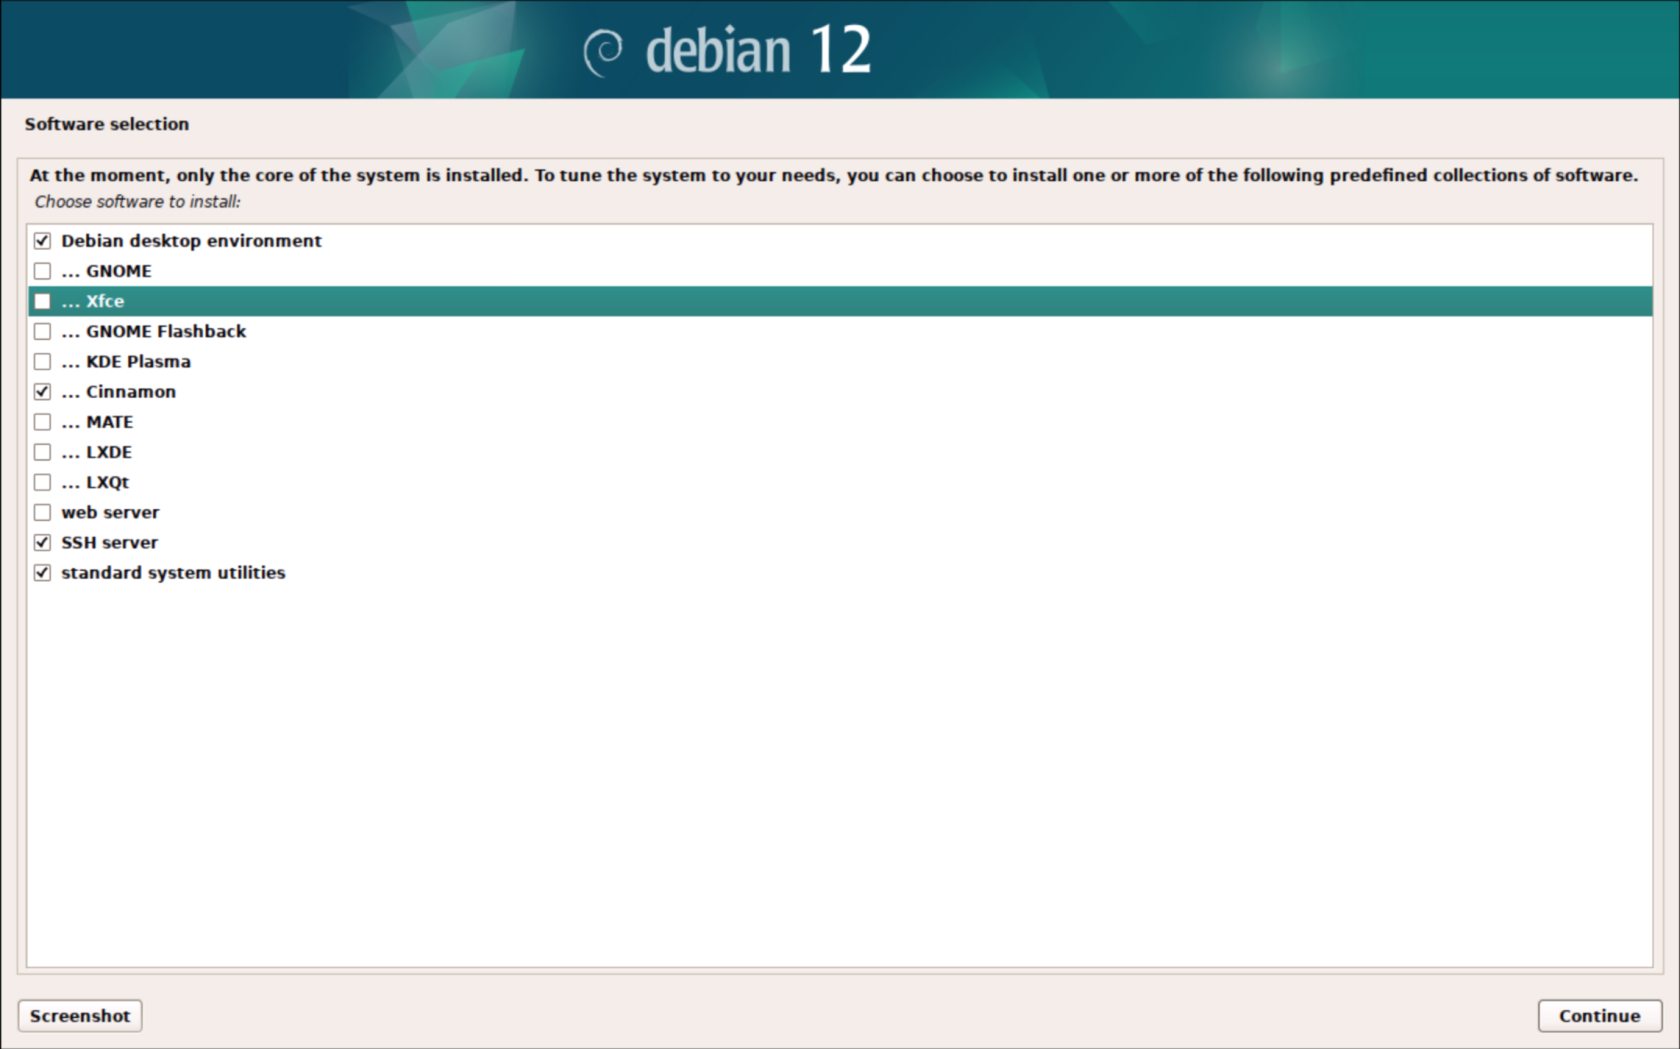
##### 21. Make sure that the following are selected:
- ##### Debian desktop environment
- ##### Cinnamon
- ##### SSH server
- ##### standard system utilities
##### [](https://bookstack.archfox.org/uploads/images/gallery/2025-02/X2gFdChERbWodNzE-image.png)
##### 22. This will take about ~5 minutes to download and install all of the packages
##### [](https://bookstack.archfox.org/uploads/images/gallery/2025-02/Y0uoV4vSN9UCWs2F-image.png)
##### 23. Choose yes to install grub
##### [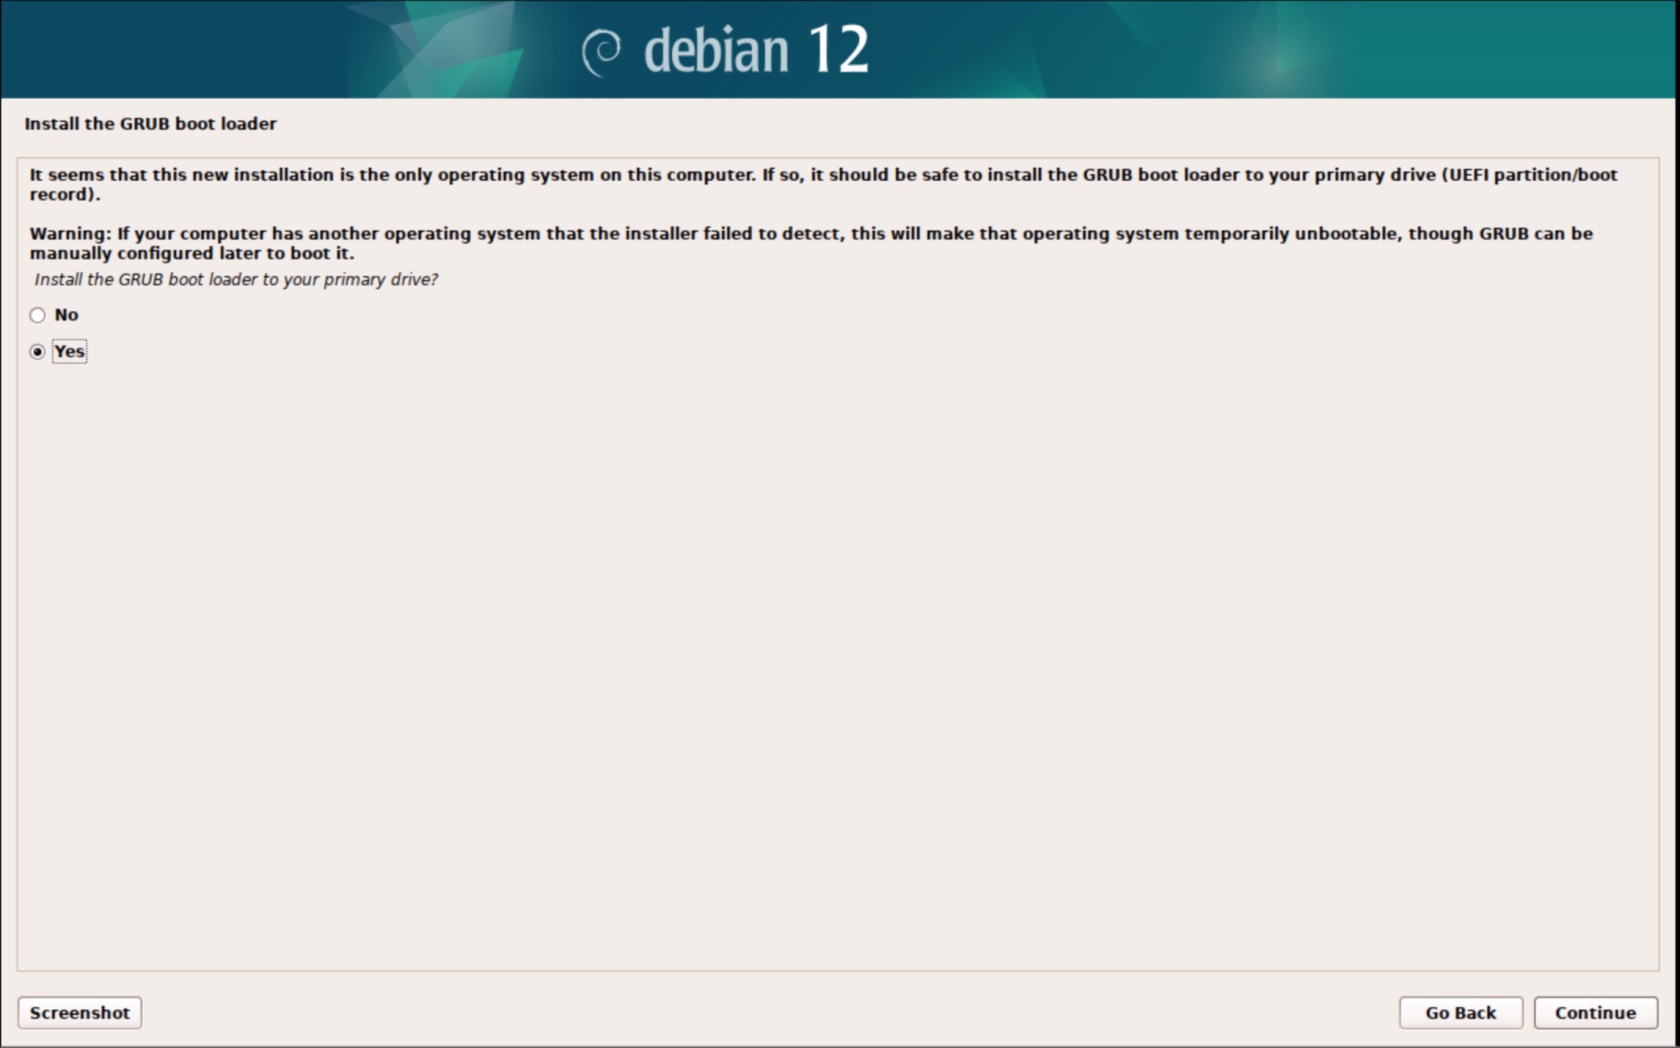](https://bookstack.archfox.org/uploads/images/gallery/2025-02/nrADlItJXay2ay6p-image.png)
##### 24. There should only be one option available make sure to select it
##### [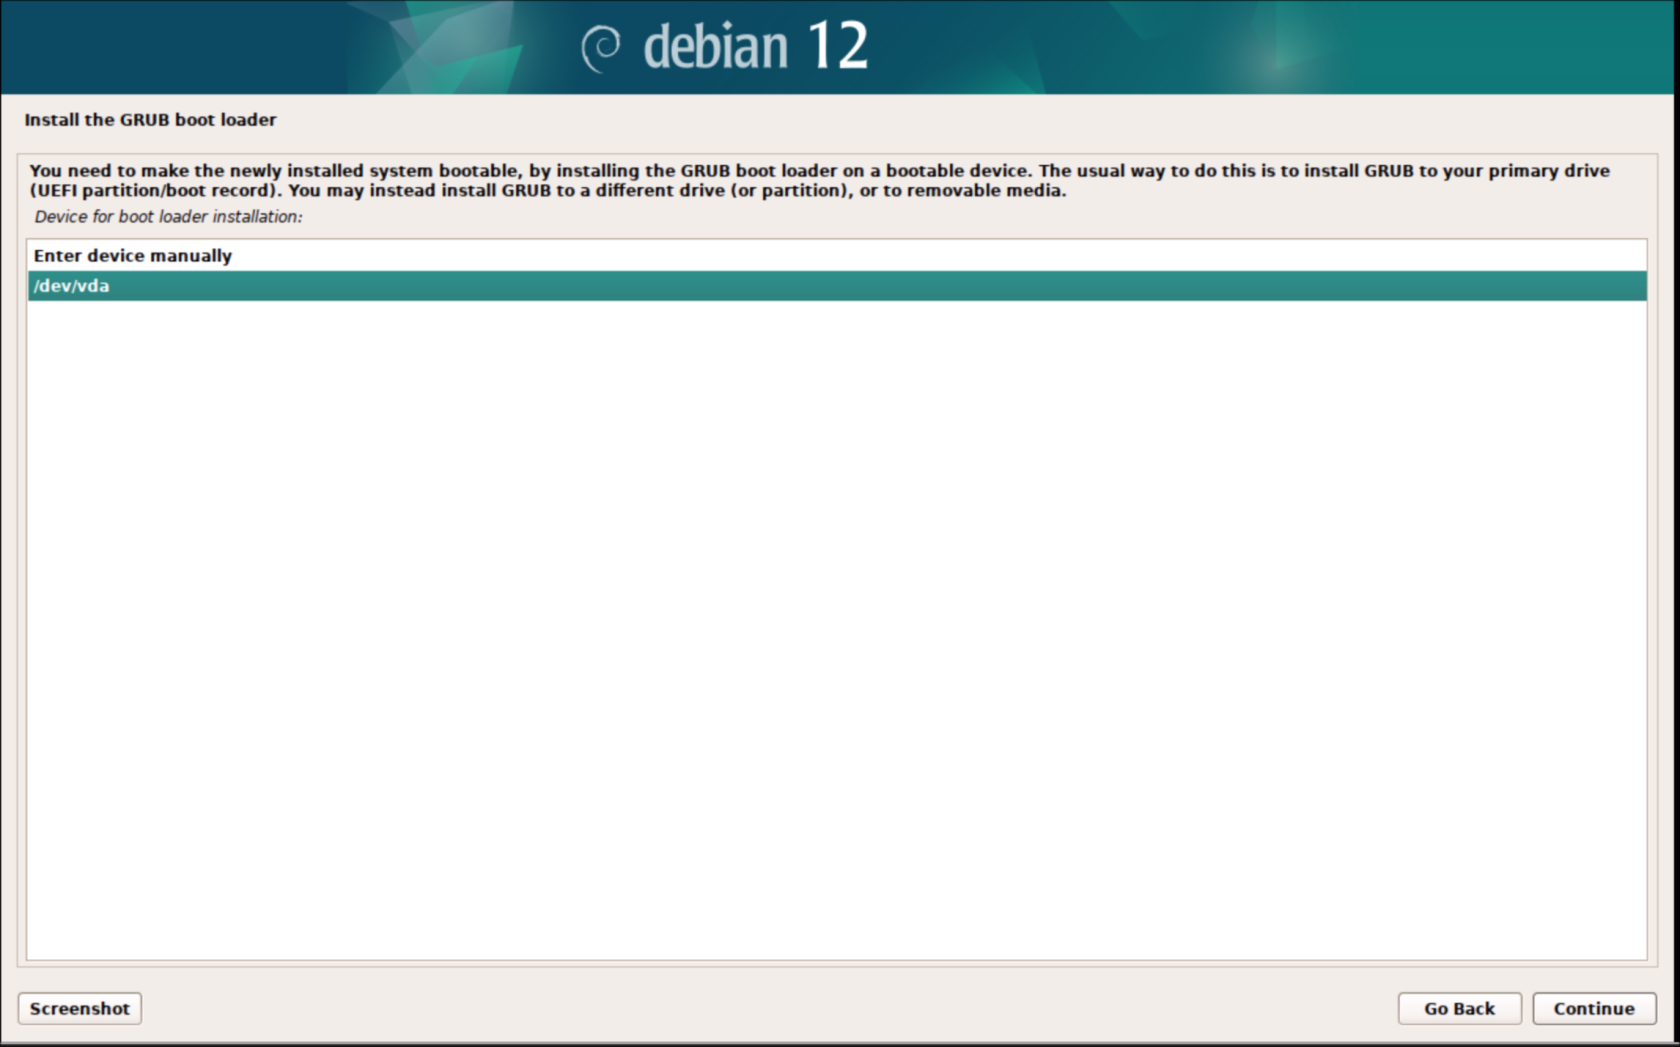](https://bookstack.archfox.org/uploads/images/gallery/2025-02/jdHtbnS2rXpiiJVg-image.png)
##### 25. Choose continue to reboot
##### [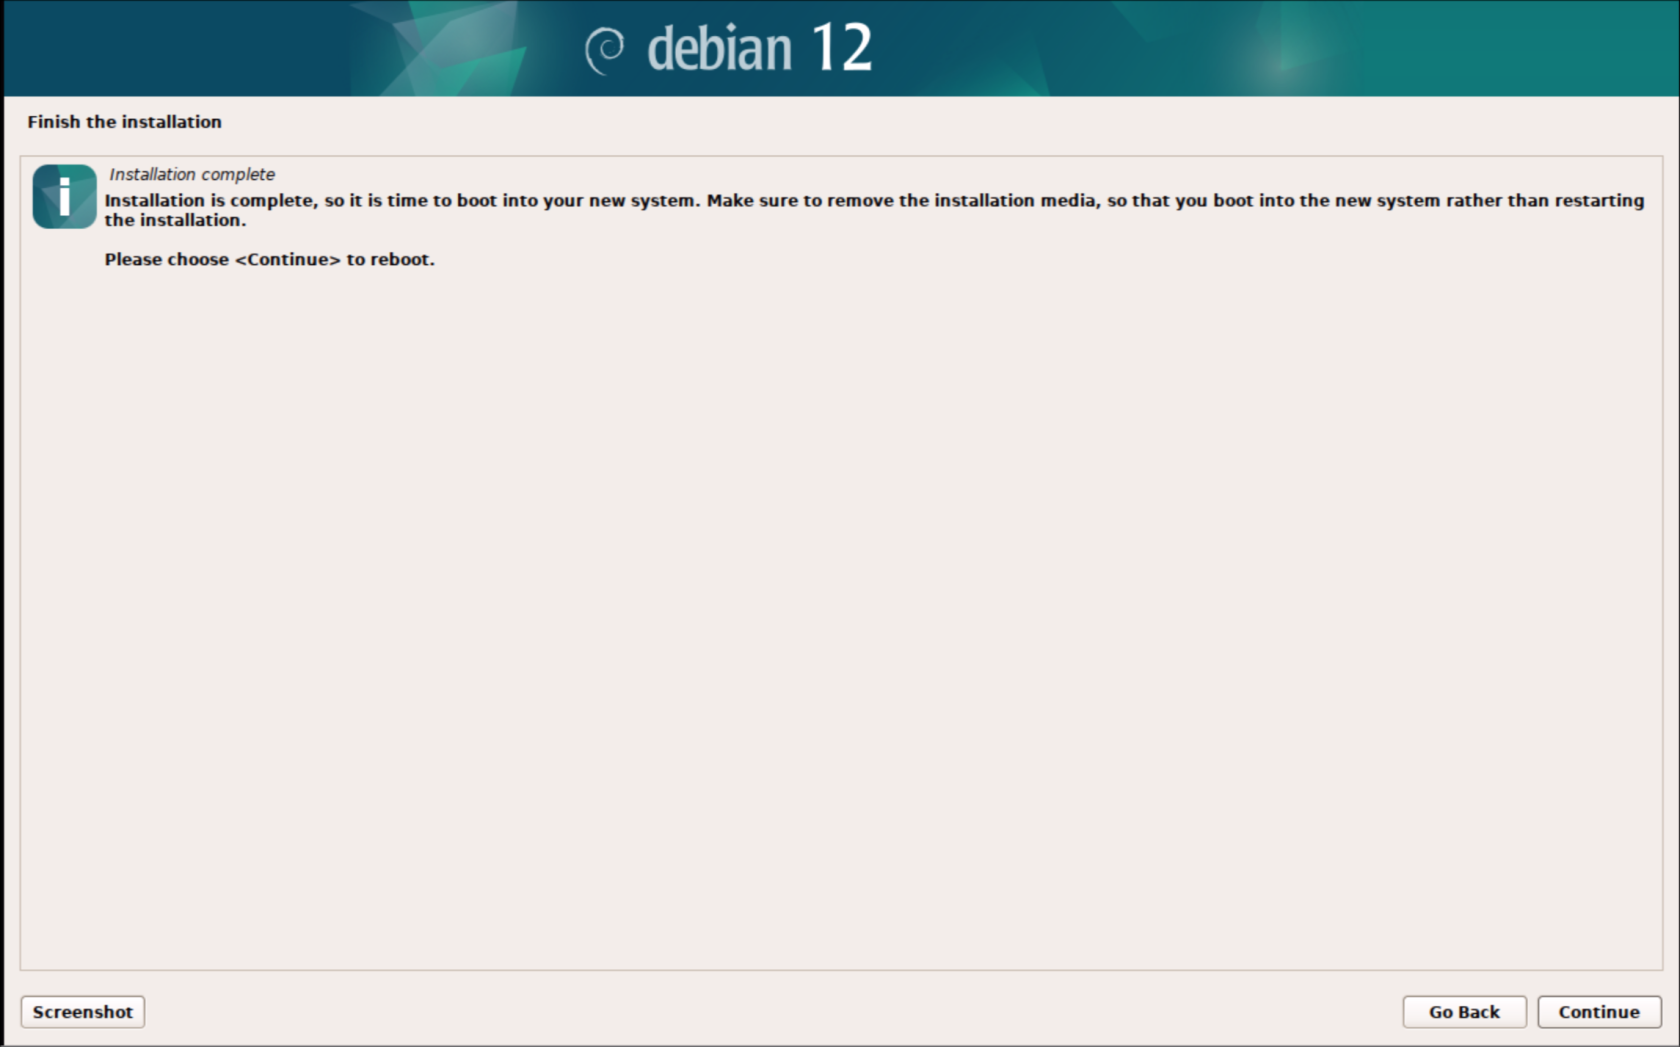](https://bookstack.archfox.org/uploads/images/gallery/2025-02/9tFnznDdnMvBqReK-image.png)
### Post install
##### 1. login with the root user to do final configuration
##### [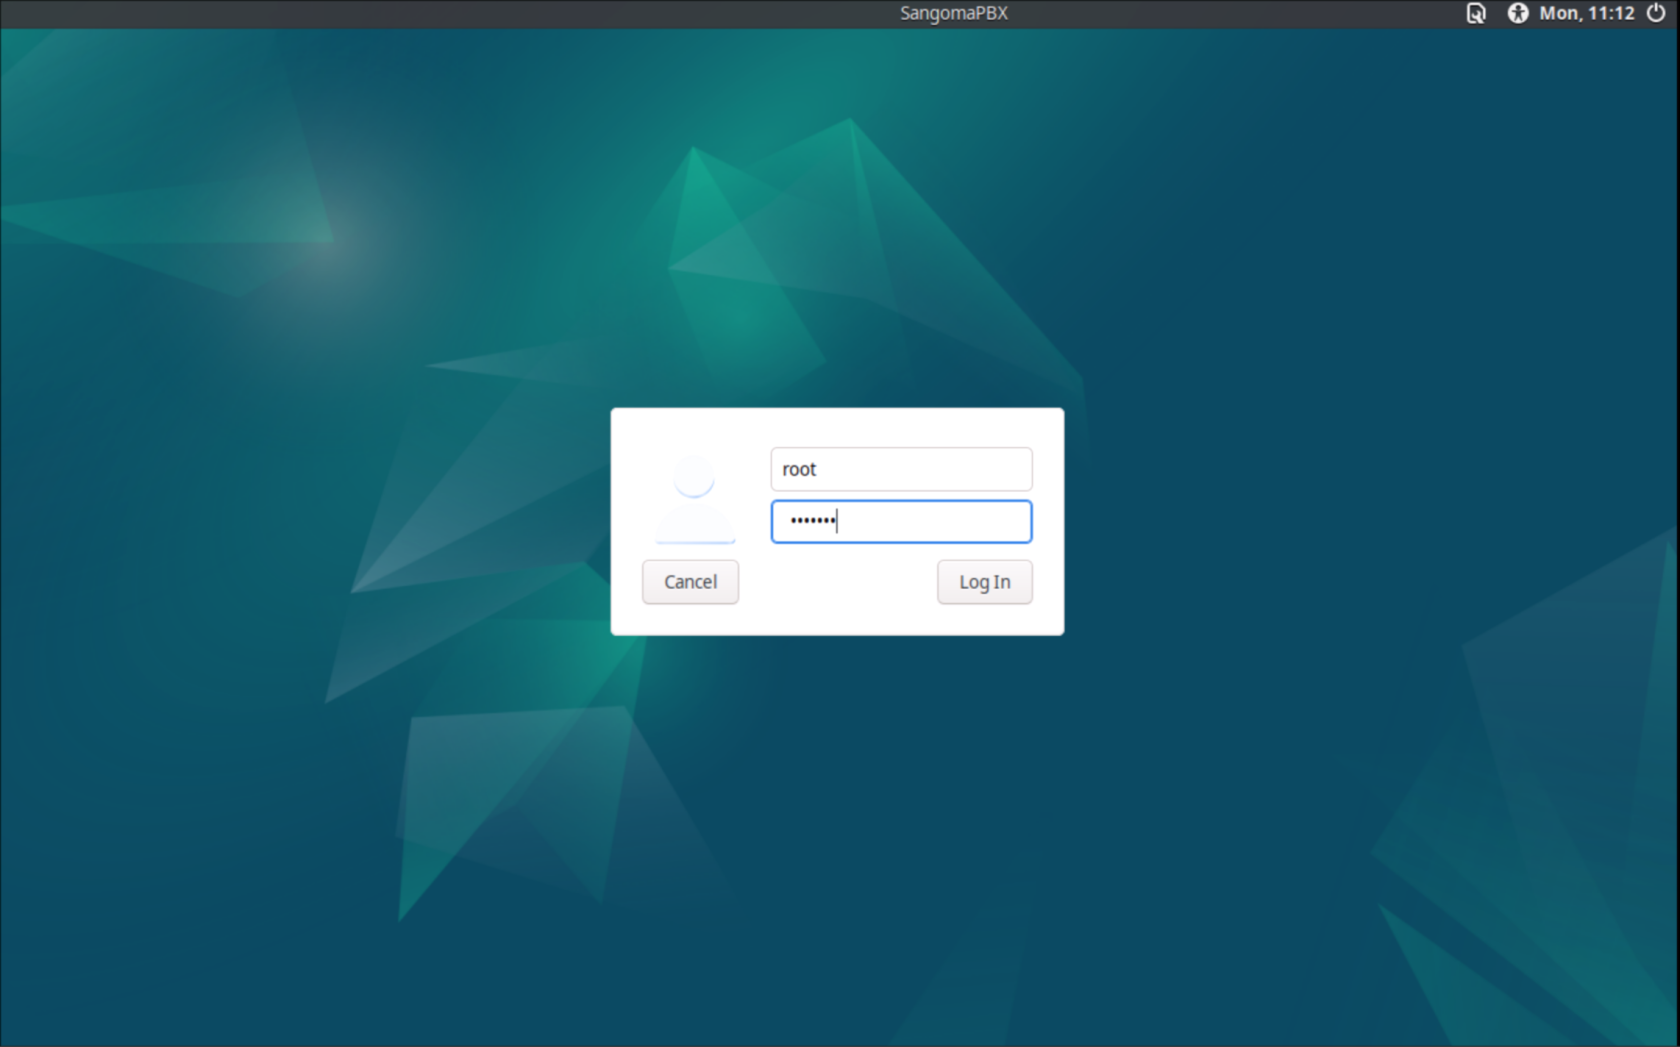](https://bookstack.archfox.org/uploads/images/gallery/2025-02/PpehKq9wXYteUyu1-image.png)
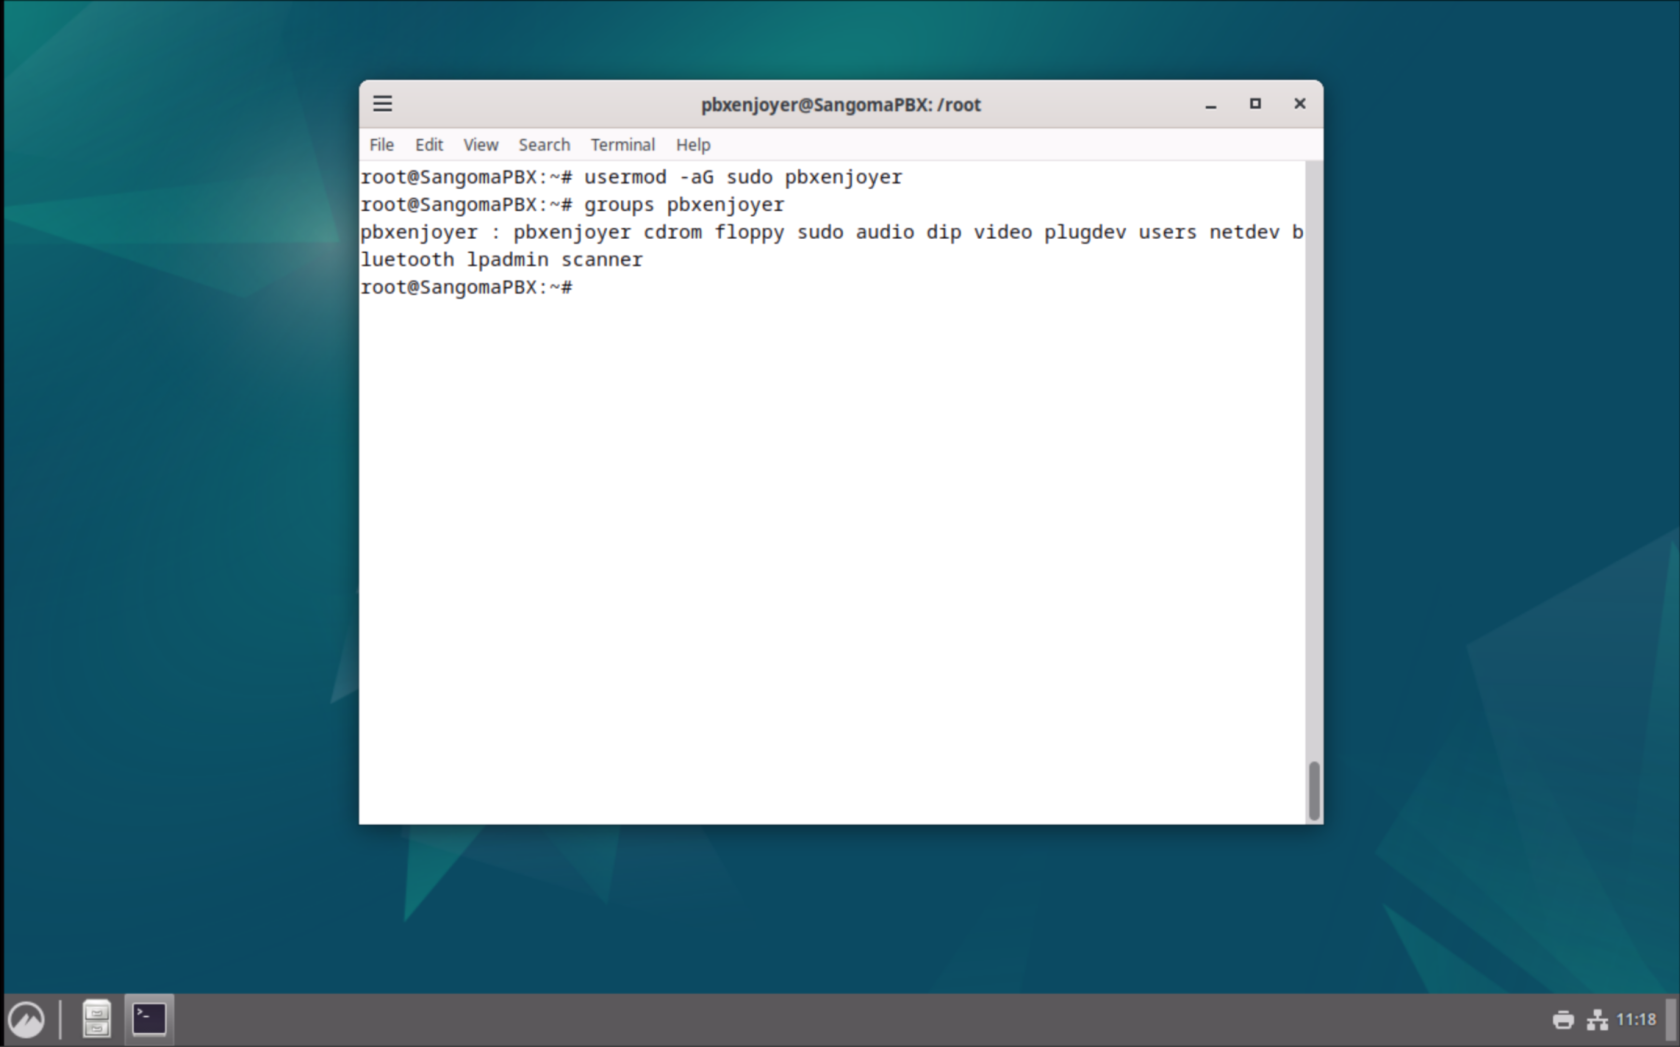
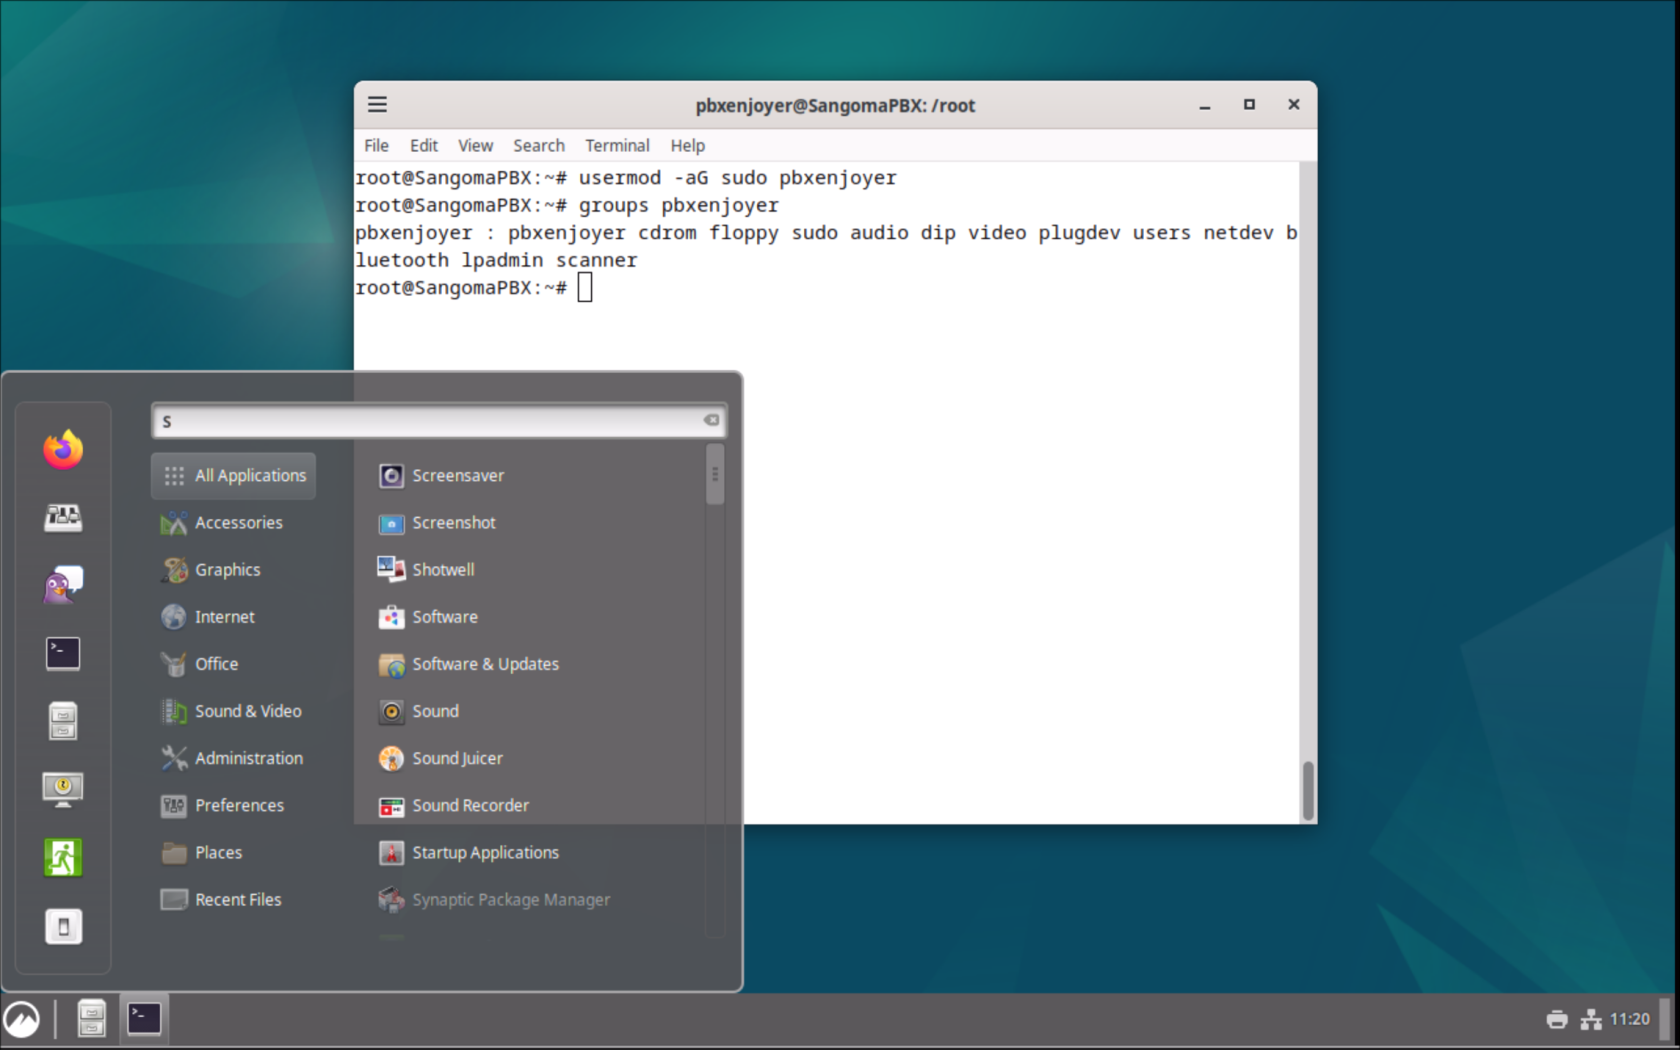
##### 2. Open the terminal from the taskbar on the bottom and run the command
```bash
usermod -aG sudo pbxenjoyer
```
##### Replace pbxenjoyer with a different username if a different username was used
##### [](https://bookstack.archfox.org/uploads/images/gallery/2025-02/WMbUlIeyTQwgN9Uv-image.png)
##### 3. Logout by clicking the menu in the bottom left and then clicking the Green exit button. Log back in as pbxenjoyer with the password that was set for it earlier (should be the same as the root user)
##### [](https://bookstack.archfox.org/uploads/images/gallery/2025-02/pNy3X3Q46RcPNWXT-image.png)
### FreePBX install
##### 1. At this point SSH is installed and running you can ssh into the server:
```bash
ssh pbxenjoyer@10.0.0.10
```
##### Replace the IP with the server IP which can be found by clicking the Network Icon on the bottom right.
##### 2. Either in SSH or the Terminal run this command to install FreePBX. This will take about 5 minutes to install.
```
cd /tmp
wget https://github.com/FreePBX/sng_freepbx_debian_install/raw/master/sng_freepbx_debian_install.sh -O /tmp/sng_freepbx_debian_install.sh
sudo bash /tmp/sng_freepbx_debian_install.sh
```
##### 3. After it is finished running you can go the IP address in your browser to access the FreePBX webui and complete the PBX setup.
### Optional Steps
##### 1. Run this command to install Doom
```
sudo apt install chocolate-doom
```
##### 2. Open the menu in the bottom left and searching for Doom. Run the first option
[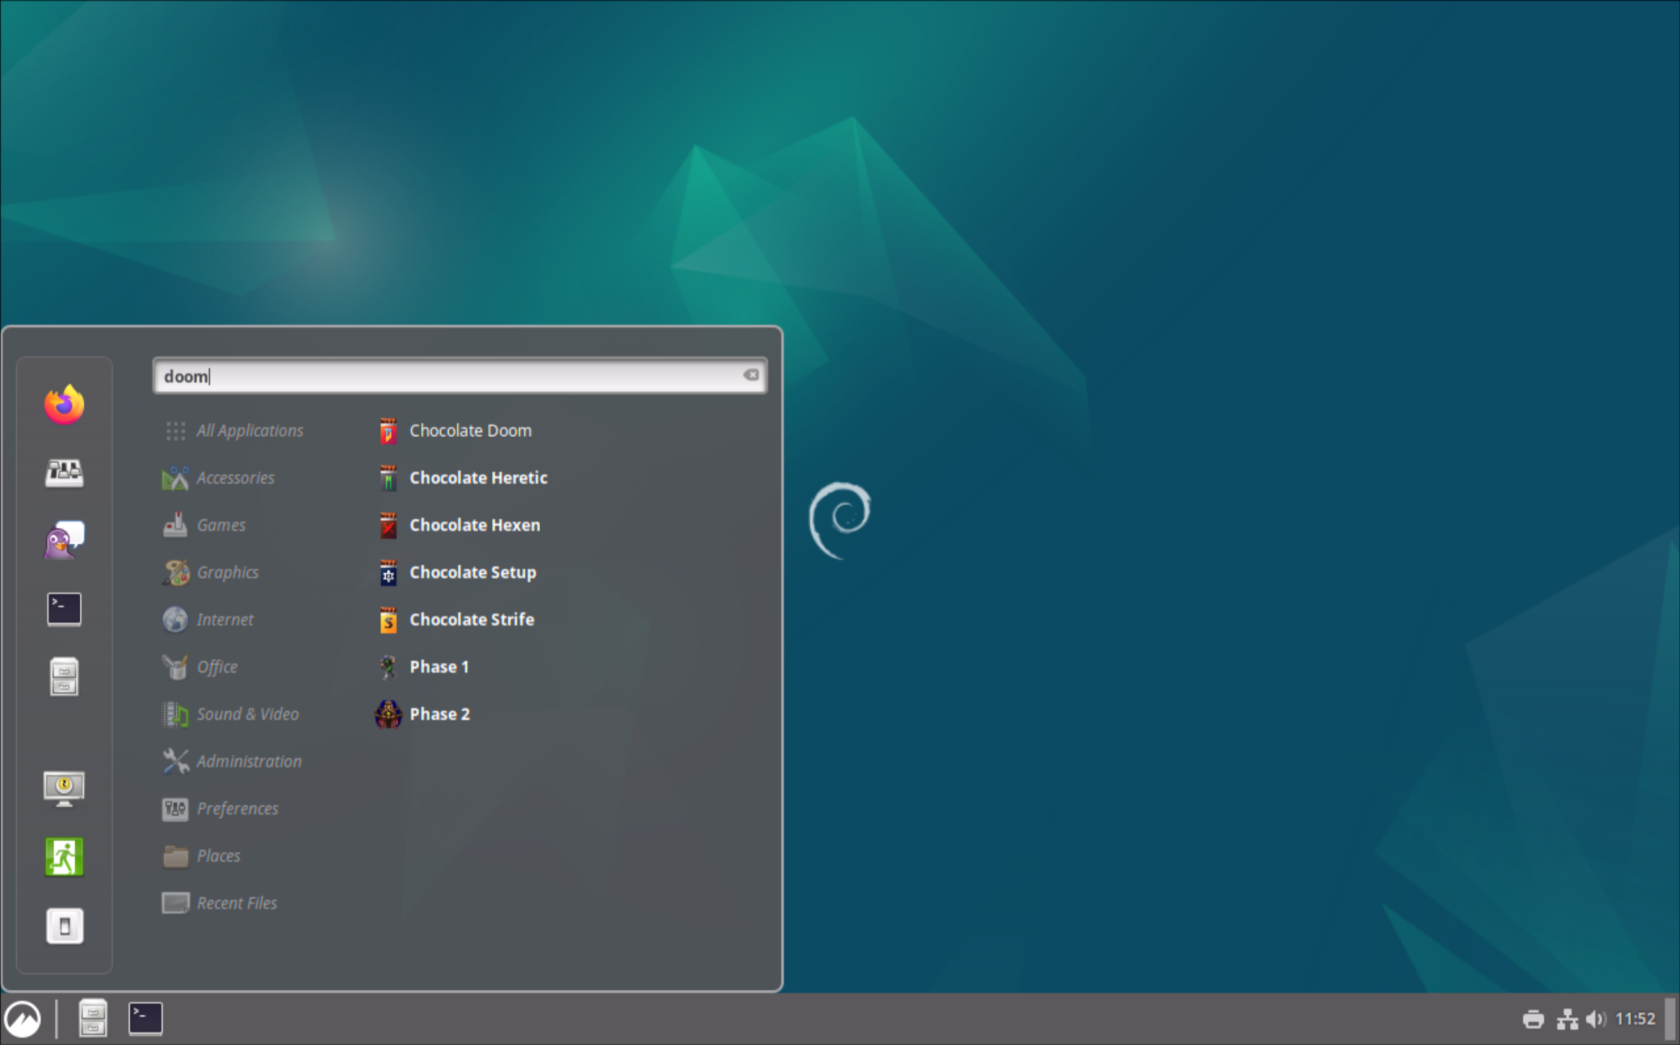](https://bookstack.archfox.org/uploads/images/gallery/2025-02/jL7voiwlX9JM25Ir-image.png)
# Cloning the Disk Image
#### From a live Linux ISO
```bash
su root
# Mount Ventoy
udevadm trigger
mount /dev/mapper/sdb1 /mnt
cd /mnt/Images
# Change diskname Example: /dev/sda
DISKNAME=/dev/CHANGE_ME
lz4 -dc PBX-LVM.img.lz4 | dd of=$DISKNAME status=progress
# Repair Partition tables in gdisk
# Delete lvm partition and expand to whole drive
gdisk $DISKNAME
partprobe
pvresize $DISKNAME
lvresize -L +3G PBX-vg/swap_1
lvresize -l +100%FREE --resizefs PBX-vg/root
```
#### Grubbies!
```
mount /dev/mapper/PBX--vg-root /mnt/
mount /dev/sda2 /mnt/boot
mount /dev/sda1 /mnt/boot/efi
for i in /dev /dev/pts /proc /sys /sys/firmware/efi/efivars /run; do mount -B $i /mnt/$i; done
chroot /mnt
grub-install --target=x86_64-efi --efi-directory=/boot/efi --bootloader-id=debian
update-grub
exit
umount -R /mnt
```
#### Make swap a thing that works
```bash
sudo swapoff -a
sudo mkswap /dev/mapper/PBX-vg--swap-1
sudo swapon /dev/mapper/PBX-vg--swap-1
```
# Creating Disk Image
```bash
qemu-img convert -f qcow2 -O raw PBX.qcow2 PBX.img
# Shrink the internal partitions
# gparted and lvm idr go google it u chud
losetup -fP PBX.img
vgchange -a y PBX-vg
lvreduce -L 13G -r PBX-vg/root
lvreduce -L 976M PBX-vg/swap_1
gparted /dev/loop0
vgchange -a n PBX-vg
losetup -d /dev/loop0
fdisk -l ./PBX.img
# Change first number to be the ending sector from fdisk
truncate --size=$[(#ChangeME+100)*512] PBX.img
# Set the output dir to your USB stick to save time writing to local disk and rewriting againt to USB
dd if=PBX.img bs=64M conv=sync status=progress | lz4 -z > /mnt/USB/Images/PBX.img.lz4
```
# Restore Sangoma Backup
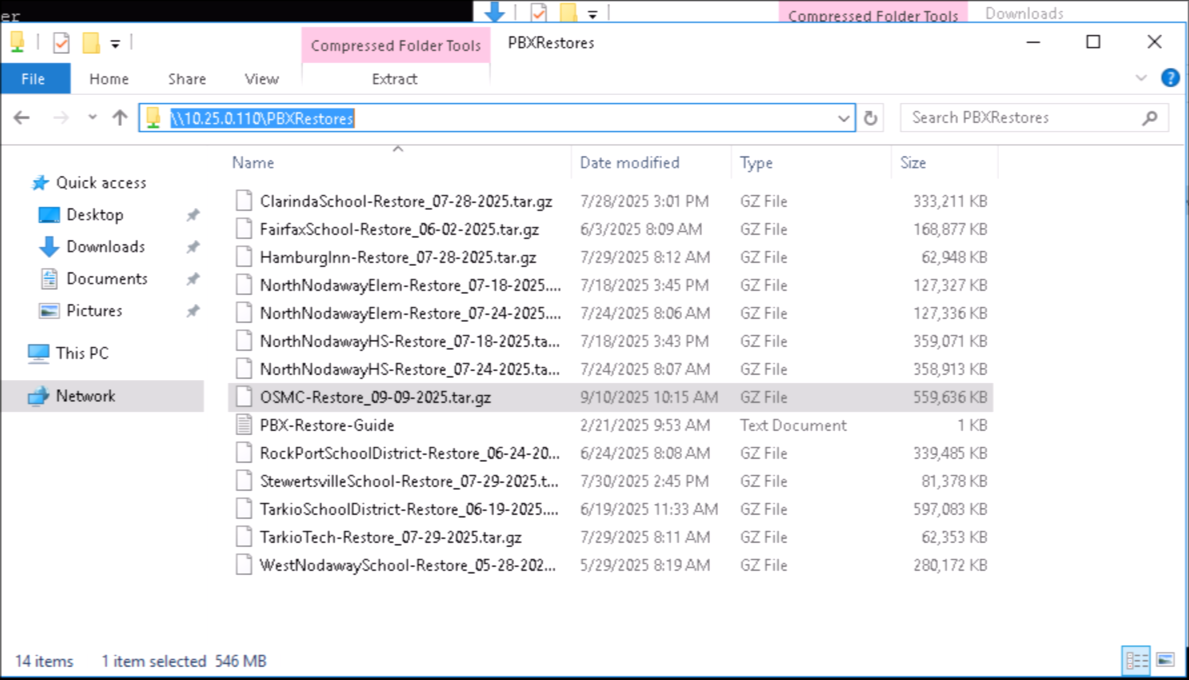
1. ##### Access Backups on TS at
```
\\10.25.0.110\PBXRestores
```
[](https://bookstack.archfox.org/uploads/images/gallery/2025-09/WsPYNOKE8hK2w6SB-image.png)
2. ##### Upload backup to the server to folder
```
/var/spool/asterisk
```
Use scp command to upload
```
scp backup.tar.gz root@serverip:/var/spool/asterisk
```
3. ##### Run
```
fwconsole backup --restore backup.tar.gz
```
4. ##### Activate
```
fwconsole activate LicenseCode
```
# Debian 12 FTP Source Error
The Error
```bash
N: Repository 'http://ftp.debian.org/debian stable InRelease' changed its 'Version' value from '12.11' to '13.1'
E: Repository 'http://ftp.debian.org/debian stable InRelease' changed its 'Codename' value from 'bookworm' to 'trixie'
```
[](https://bookstack.archfox.org/uploads/images/gallery/2025-11/IyncIX0rPMX2nZ8d-image.png)
If you get this error when running **sudo apt update** it is because of a source that points to a Debian 13 source. Sometimes PBX will also display an error message in the update module
### Solutions
#### fwconsole fix
This is the recommended solution provided in pbx. It seems to be able to detect the error automatically itself.
```bash
sudo fwconsole sa disable-deb-update-v13
```
```
sudo apt update -y && sudo apt upgrade -y
```
#### Manual Fix
**One line fix command:**
```bash
sudo sed -i '/stable/ s/\bstable\b/bookworm/' /etc/apt/sources.list.d/archive_uri-http_ftp_debian_org_debian-bookworm.list
```
```
sudo apt update -y && sudo apt upgrade -y
```
**Else edit by hand:**
- Edit **/etc/apt/sources.list.d/archive\_uri-http\_ftp\_debian\_org\_debian-bookworm.list** ```bash
sudo vim /etc/apt/sources.list.d/archive_uri-http_ftp_debian_org_debian-bookworm.list
```
- Change the first line from:
```bash
deb [arch=amd64] http://deb.freepbx.org/freepbx17-prod stable main
```
To this:
```bash
deb [arch=amd64] http://deb.freepbx.org/freepbx17-prod bookworm main
```
- Save it and now you can run your updates:
```
sudo apt update -y && sudo apt upgrade -y
```